Welcome to the LifeTO wiki archive! This is a mirror of the old ggFTW wiki, and much of the content is inaccurate for LifeTO. Please consider checking out the knowledgebase if you're just looking up info about items.

If you're coming from another server, consider giving us a try since you're here anyways :)
 

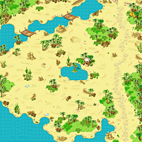
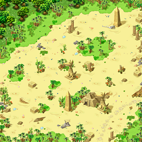
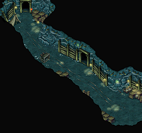
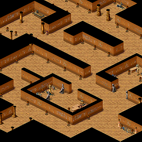
Category:Desert Beach Quest

From ggFTW Trickster Wiki

Jump to: navigation, search
Desert Beach
Quests by Level Quests by Type Quests by Location
Coral Beach Desert Beach Megalopolis Caballa Relics
Oops Wharf Mermaid Palace Mirage Island Ghost Blue
Rose Garden Black Swamp Underground
Dev Room
Snow Hill
Alteo Empire Techichi Volcano Tapasco Volcano Abyss
Tower of Chaos
1st to 12th 13th to 24th 25th to 36th 37th to 48th 49th to 60th 61st to 72nd


Story Quests

Episode 0: Chapter 2 - Don Giuvanni's Push

Don Giuvanni - Don Giuvanni's Training Pt. 1


Image:Don Giuvanni.gif
Image:Gate of Desert Beach.png
Image:Circle.gif
NPC: Don Giuvanni Location: Gate of Desert Beach
Base Experience: 21,763 TM Experience: 21,763
Request: Drilling for Dummies Condition: Level 13+, Have completed Lifeguard Bean - Meet Don Giuvanni
Reward: 5x Oasis Water, 5x Distilled Water, 5x Empty Potion Bottle, Drilling for Dummies
  • {{{Start}}} has been started!
  • {{{Complete}}} has been completed!

Notes: Drilling for Dummies Drilling for Dummies is obtained by completing Driller Marky - Master Drilling!.


Driller Marky - Master Drilling!


Image:Driller Marky.gif
Image:Gate of Desert Beach.png
Image:Circle.gif
NPC: Driller Marky Location: Gate of Desert Beach
Base Experience: 21,763 TM Experience: 21,763
Request: 2x Tanning Oil Condition: Level 13+
Reward: Peng, Drilling for Dummies
  • {{{Start}}} has been started!
  • Next Quest in Episode: [[{{{Next}}}]]
  • {{{Complete}}} has been completed!

Notes: Tanning Oil Tanning Oil is drilled in Gate of Desert Beach.


Don Giuvanni - Meet Officer Robert


Image:Don Giuvanni.gif
Image:Gate of Desert Beach.png
Image:Circle.gif
NPC: Don Giuvanni Location: Gate of Desert Beach
Base Experience: 21,763 TM Experience: 21,763
Request: Find and talk to Officer Robert Condition: Have completed Don Giuvanni - Don Giuvanni's Training Pt. 1
Reward: 5x Oasis Water, 5x Distilled Water, 5x Empty Potion Bottle
  • {{{Start}}} has been started!
  • {{{Complete}}} has been completed!


Officer Robert - Don Giuvanni's Training Pt. 2


Image:Officer Robert.gif
Image:Beach Town - Paradise.png
Image:Circle.gif
NPC: Officer Robert Location: Beach Town - Paradise
Base Experience: 21,763 TM Experience: 21,763
Request: Desert Potion Condition: Have completed Don Giuvanni - Meet Officer Robert
Reward: 5x Hard Scales, Life Vest
  • {{{Start}}} has been started!
  • {{{Complete}}} has been completed!


Officer Robert - Don's Push - 3rd Stage


Image:Officer Robert.gif
Image:Beach Town - Paradise.png
Image:Circle.gif
NPC: Officer Robert Location: Beach Town - Paradise
Base Experience: 21,763 TM Experience: 21,763
Request: Nate's Certification Condition: Have completed Officer Robert - Don Giuvanni's Training Pt. 2
Reward: 20x Pink Potion B, 20x Blue Potion B, Wooden Sword
  • {{{Start}}} has been started!
  • {{{Complete}}} has been completed!

Notes: Nate's Certification Nate's Certification is obtained by completing Let's Try Maturing Compounding!.


Alchemist Nate - Let's Try Maturing Compounding!


Image:Alchemist Nate.gif
Image:Paradise Shop.png
Image:Circle.gif
NPC: Alchemist Nate Location: Paradise Shop
Base Experience: 21,763 TM Experience: 21,763
Request: Compound Life Vest with Hard Scales Condition: Have Officer Robert - Don's Push - 3rd Stage in quest log
Reward: Mature Compounding Guide, Nate's Certification
  • {{{Start}}} has been started!
  • Next Quest in Episode: [[{{{Next}}}]]
  • {{{Complete}}} has been completed!

Notes: Life Vest Life Vest and Hard Scales Hard Scales are obtained by completing Don Giuvanni's Training Pt. 2.


Officer Robert - Don's Push - 4th Stage


Image:Officer Robert.gif
Image:Beach Town - Paradise.png
Image:Circle.gif
NPC: Officer Robert Location: Beach Town - Paradise
Base Experience: 87,054 TM Experience: 43,527
Request: Refining Guide, Wooden Sword refined at Level 1 Condition: Have completed Officer Robert - Don's Push - 3rd Stage
Reward: Refining Guide, Hologram Port, 5x Beginner's Scroll of Revival
  • {{{Start}}} has been started!
  • Episode 0: Chapter 2 - Don Giuvanni's Push has been completed!

Notes: Refining Guide Refining Guide is obtained by completing Blacksmith Marx - Learn to Refine!.


Blacksmith Marx - Learn to Refine!


Image:Blacksmith Marx.gif
Image:Paradise Shop.png
Image:Circle.gif
NPC: Blacksmith Marx Location: Paradise Shop
Base Experience: 21,763 TM Experience: 21,763
Request: 7x Bronze Fragment Condition: Have Officer Robert - Don's Push - 4th Stage in quest log
Reward: Refining Guide, 7x Bronze Fragment, Wooden Sword
  • {{{Start}}} has been started!
  • Next Quest in Episode: [[{{{Next}}}]]
  • {{{Complete}}} has been completed!


Episode 0: Chapter 3 - Our Prologue

Andrew - Meet the Natives!


Image:Andrew.gif
Image:Beach Town - Paradise.png
Image:Circle.gif
NPC: Andrew Location: Beach Town - Paradise
Base Experience: 176,960 TM Experience: 50,160
Request: 8x Heart Gem Condition: Level 20+, have completed Officer Robert - Don's Push - 4th Stage
Reward: Health Charm, 10x Wing Port (Paradise)
  • Episode 0: Chapter 3 - Our Prologue has been started!
  • Next Quest in Episode: [[{{{Next}}}]]
  • Episode 0: Chapter 3 - Our Prologue has been completed!


Steve Ryu - Helping Confess


Image:Steve Ryu.gif
Image:Beach Town - Paradise.png
Image:Circle.gif
NPC: Steve Ryu Location: Beach Town - Paradise
Base Experience: 35,392 TM Experience: 10,032
Request: 3x Bouquet Condition: Level 20+, except Bunny
Reward: Bunny Card, Heart Gem
  • {{{Start}}} has been started!
  • Next Quest in Episode: [[{{{Next}}}]]
  • {{{Complete}}} has been completed!

Notes: Bouquet Bouquet is dropped by Hula Octopus (Lv.25).


Steve Ryu - Wacky Confession


Image:Steve Ryu.gif
Image:Beach Town - Paradise.png
Image:Circle.gif
NPC: Steve Ryu Location: Beach Town - Paradise
Base Experience: 35,392 TM Experience: 10,032
Request: Handkerchief of Challenge Condition: Level 20+, Bunny
Reward: Bouquet, Heart Gem, Baby Bunny, Strong Ring
  • {{{Start}}} has been started!
  • Next Quest in Episode: [[{{{Next}}}]]
  • {{{Complete}}} has been completed!

Notes: Handkerchief of Challenge Handkerchief of Challenge is obtained by completing Mermaid Babe - The Mark of Love!. When you start this quest, Steve Ryu gives Written Challenge.


Mermaid Babe - The Mark of Love!


Image:Mermaid Babe.gif
Image:Desert Beach Field 2 - Sand Palace.png
Image:Circle.gif
NPC: Mermaid Babe Location: Desert Beach Field 2 - Sand Palace
Base Experience: 35,392 TM Experience: 10,032
Request: 3x Red Lipstick, Written Challenge Condition: Level 20+, have Steve Ryu - Wacky Confession is quest log
Reward: Handkerchief of Challenge
  • {{{Start}}} has been started!
  • Next Quest in Episode: [[{{{Next}}}]]
  • {{{Complete}}} has been completed!


Don Giuvanni - A Famous Model's Picture


Image:Don Giuvanni.gif
Image:Beach Town - Paradise.png
Image:Circle.gif
NPC: Don Giuvanni Location: Beach Town - Paradise
Base Experience: 35,392 TM Experience: 10,032
Request: Jenny's Photo B Condition: Level 20+, except Cat
Reward: Cat Card, 10x Blue Potion B, Heart Gem
  • {{{Start}}} has been started!
  • Next Quest in Episode: [[{{{Next}}}]]
  • {{{Complete}}} has been completed!


Don Giuvanni - Enemies in a Place like this?


Image:Don Giuvanni.gif
Image:Beach Town - Paradise.png
Image:Circle.gif
NPC: Don Giuvanni Location: Beach Town - Paradise
Base Experience: 35,392 TM Experience: 10,032
Request: 3x Clam Meat Condition: Level 20+, Cat
Reward: Director's Letter, Kitten, Heart Gem, Solid Ring
  • {{{Start}}} has been started!
  • Next Quest in Episode: [[{{{Next}}}]]
  • {{{Complete}}} has been completed!

Notes: Clam Meat Clam Meat is dropped by Shell Trap (Lv.19).


Clever Owl - The Owl's Worry


Image:Clever Owl.gif
Image:Beach Town - Paradise.png
Image:Circle.gif
NPC: Clever Owl Location: Beach Town - Paradise
Base Experience: 35,392 TM Experience: 10,032
Request: 3x Golden Mole Feather Condition: Level 20+, except Sheep
Reward: Sheep Card, Heart Gem
  • {{{Start}}} has been started!
  • Next Quest in Episode: [[{{{Next}}}]]
  • {{{Complete}}} has been completed!

Notes: Golden Mole Feather Golden Mole Feather is dropped by Golden Mole (Lv.20).


Clever Owl - The Owl from that Time


Image:Clever Owl.gif
Image:Beach Town - Paradise.png
Image:Circle.gif
NPC: Clever Owl Location: Beach Town - Paradise
Base Experience: 35,392 TM Experience: 10,032
Request: Magic Sealed Letter Condition: Level 20+, Sheep
Reward: Unsealed Letter, Lamb, Heart Gem, Smart Ring
  • {{{Start}}} has been started!
  • Next Quest in Episode: [[{{{Next}}}]]
  • {{{Complete}}} has been completed!


Kristoffer J. - Weird Fisherman


Image:Kristoffer J..gif
Image:Beach Town - Paradise.png
Image:Circle.gif
NPC: Kristoffer J. Location: Beach Town - Paradise
Base Experience: 35,392 TM Experience: 10,032
Request: 3x Salt Condition: Level 20+, except Fox
Reward: 20x Salted Dry Fish, Fox Card, Heart Gem
  • {{{Start}}} has been started!
  • Next Quest in Episode: [[{{{Next}}}]]
  • {{{Complete}}} has been completed!


Kristoffer J. - Fished Up Scroll


Image:Kristoffer J..gif
Image:Beach Town - Paradise.png
Image:Circle.gif
NPC: Kristoffer J. Location: Beach Town - Paradise
Base Experience: 35,392 TM Experience: 10,032
Request: 3x Earthworm Condition: Level 20+, Fox
Reward: Envelope with Photo, Fox Pup, Heart Gem, Accurate Ring
  • {{{Start}}} has been started!
  • Next Quest in Episode: [[{{{Next}}}]]
  • {{{Complete}}} has been completed!

Notes: Earthworm Earthworm is dropped by Golden Mole (Lv.20).


Dorothy - A Present for a Sick Friend (1)


Image:Dorothy.gif
Image:Beach Town - Paradise.png
Image:Circle.gif
NPC: Dorothy Location: Beach Town - Paradise
Base Experience: 35,392 TM Experience: 10,032
Request: 3x Scorpion Jerky Condition: Level 20+, except Lion
Reward: Lion Card, Heart Gem
  • {{{Start}}} has been started!
  • Next Quest in Episode: [[{{{Next}}}]]
  • {{{Complete}}} has been completed!

Notes: Scorpion Jerky Scorpion Jerky is dropped by Sea Scorpion (Lv.22).


Dorothy - Guardian of Dreams


Image:Dorothy.gif
Image:Beach Town - Paradise.png
Image:Circle.gif
NPC: Dorothy Location: Beach Town - Paradise
Base Experience: 35,392 TM Experience: 10,032
Request: 3x Twinkle Star Condition: Level 20+, Lion
Reward: Lion Cub, Child's Letter, Heart Gem, Accurate Ring
  • {{{Start}}} has been started!
  • Next Quest in Episode: [[{{{Next}}}]]
  • {{{Complete}}} has been completed!

Notes: Twinkle Star Twinkle Star is dropped by Fanta Slime (Lv.18).


Officer Tera - Help Keep the Peace


Image:Officer Tera.gif
Image:Beach Town - Paradise.png
Image:Circle.gif
NPC: Officer Tera Location: Beach Town - Paradise
Base Experience: 35,392 TM Experience: 10,032
Request: 3x Illegal CD Condition: Level 20+, except Buffalo
Reward: 500 Galder Coupon, Buffalo Card, Heart Gem
  • {{{Start}}} has been started!
  • Next Quest in Episode: [[{{{Next}}}]]
  • {{{Complete}}} has been completed!

Notes: Illegal CD Illegal CD is dropped by Grumpy Octopus (Lv.29).


Officer Tera - An Unexpected Encounter


Image:Officer Tera.gif
Image:Beach Town - Paradise.png
Image:Circle.gif
NPC: Officer Tera Location: Beach Town - Paradise
Base Experience: 35,392 TM Experience: 10,032
Request: 3x Illegal CD Condition: Level 20+, Buffalo
Reward: 500 Galder Coupon, Buffalo Calf, Heart Gem, Strong Ring
  • {{{Start}}} has been started!
  • Next Quest in Episode: [[{{{Next}}}]]
  • {{{Complete}}} has been completed!

Notes: Illegal CD Illegal CD is dropped by Grumpy Octopus (Lv.29).


Old Artist - Cherishing Destinies


Image:Old Artist.gif
Image:Desert Beach Field 2 - Sand Palace.png
Image:Circle.gif
NPC: Old Artist Location: Desert Beach Field 2 - Sand Palace
Base Experience: 35,392 TM Experience: 10,032
Request: Paper, 2x Color Pencils Condition: Level 20+, except Dragon
Reward: Postcard, Dragon Card, 10x Pink Potion B, Heart Gem
  • {{{Start}}} has been started!
  • Next Quest in Episode: [[{{{Next}}}]]
  • {{{Complete}}} has been completed!

Notes: Paper Paper is drilled in Desert Beach Field 2 - Sand Palace or purchased in Gate of Desert Beach Shop or Paradise Shop. Color Pencils Color Pencils are dropped by Fanta Fish (Lv.21).


Old Artist - The Painter from Notre Dame


Image:Old Artist.gif
Image:Desert Beach Field 2 - Sand Palace.png
Image:Circle.gif
NPC: Old Artist Location: Desert Beach Field 2 - Sand Palace
Base Experience: 35,392 TM Experience: 10,032
Request: Paper, 2x Color Pencils Condition: Level 20+, Dragon
Reward: Postcard, Dragon Whelp, Heart Gem, Smart Ring
  • {{{Start}}} has been started!
  • Next Quest in Episode: [[{{{Next}}}]]
  • {{{Complete}}} has been completed!

Notes: Paper Paper is drilled in Desert Beach Field 2 - Sand Palace or purchased in Gate of Desert Beach Shop or Paradise Shop. Color Pencils Color Pencils are dropped by Fanta Fish (Lv.21).


Rosemary - Lookin' Good!


Image:Rosemary.gif
Image:Beach Town - Paradise.png
Image:Circle.gif
NPC: Rosemary Location: Beach Town - Paradise
Base Experience: 35,392 TM Experience: 10,032
Request: 2x Swimsuit Condition: Level 20+, except Raccoon
Reward: Raccoon Card, Heart Gem
  • {{{Start}}} has been started!
  • Next Quest in Episode: [[{{{Next}}}]]
  • {{{Complete}}} has been completed!


Rosemary - Runaway Student


Image:Rosemary.gif
Image:Beach Town - Paradise.png
Image:Circle.gif
NPC: Rosemary Location: Beach Town - Paradise
Base Experience: 35,392 TM Experience: 10,032
Request: 2x Pen, 2x Paper Condition: Level 20+, Raccoon
Reward: Signed Agreement, Raccoon Cub, Heart Gem, Solid Ring
  • {{{Start}}} has been started!
  • Next Quest in Episode: [[{{{Next}}}]]
  • {{{Complete}}} has been completed!

Notes: Pen Pen is dropped by Fanta Fish (Lv.21). Paper Paper is drilled in Desert Beach Field 2 or purchased in Gate of Desert Beach Shop or Paradise Shop.


Key Quests

Sandman - Desert Sticker


Sandman
Beach Town - Paradise
Image:Circle.gif
NPC: Sandman Location: Beach Town - Paradise
Base Experience: 57,072 TM Experience: 61,769
Request: 5x Desert Sticker
Quest Cycles: 1 Time(s) Condition: Level 25+
Cycle 1: 5x 500 Galder Coupon
Cycle {{{Cycle_2}}}: {{{Reward_2}}}
Cycle {{{Cycle_3}}}: {{{Reward_3}}}
Cycle {{{Cycle_4}}}: {{{Reward_4}}}
Cycle {{{Cycle_5}}}: {{{Reward_5}}}
Cycle {{{Cycle_6}}}: {{{Reward_6}}}
Cycle {{{Cycle_7}}}: {{{Reward_7}}}
Cycle {{{Cycle_8}}}: {{{Reward_8}}}
Cycle {{{Cycle_9}}}: {{{Reward_9}}}
Cycle {{{Cycle_10}}}: {{{Reward_10}}}
Cycle {{{Cycle_11}}}: {{{Reward_11}}}
Cycle {{{Cycle_12}}}: {{{Reward_12}}}
Cycle {{{Cycle_13}}}: {{{Reward_13}}}
Cycle {{{Cycle_14}}}: {{{Reward_14}}}
Cycle {{{Cycle_15}}}: {{{Reward_15}}}
Cycle {{{Cycle_16}}}: {{{Reward_16}}}
Cycle {{{Cycle_17}}}: {{{Reward_17}}}
Cycle {{{Cycle_18}}}: {{{Reward_18}}}
Cycle {{{Cycle_19}}}: {{{Reward_19}}}
Cycle {{{Cycle_20}}}: {{{Reward_20}}}


Sandman - Legendary Recipe


Sandman
Beach Town - Paradise
Image:Circle.gif
NPC: Sandman Location: Beach Town - Paradise
Base Experience: 57,072 TM Experience: 61,769
Request: 5x Sand Cake, 2x Limestone, Garden Trowel, Oasis Water, Sand Glass
Quest Cycles: 1 Time(s) Condition: Level 25+, have completed Sandman - Desert Sticker
Cycle 1: 5x 500 Galder Coupon
Cycle {{{Cycle_2}}}: {{{Reward_2}}}
Cycle {{{Cycle_3}}}: {{{Reward_3}}}
Cycle {{{Cycle_4}}}: {{{Reward_4}}}
Cycle {{{Cycle_5}}}: {{{Reward_5}}}
Cycle {{{Cycle_6}}}: {{{Reward_6}}}
Cycle {{{Cycle_7}}}: {{{Reward_7}}}
Cycle {{{Cycle_8}}}: {{{Reward_8}}}
Cycle {{{Cycle_9}}}: {{{Reward_9}}}
Cycle {{{Cycle_10}}}: {{{Reward_10}}}
Cycle {{{Cycle_11}}}: {{{Reward_11}}}
Cycle {{{Cycle_12}}}: {{{Reward_12}}}
Cycle {{{Cycle_13}}}: {{{Reward_13}}}
Cycle {{{Cycle_14}}}: {{{Reward_14}}}
Cycle {{{Cycle_15}}}: {{{Reward_15}}}
Cycle {{{Cycle_16}}}: {{{Reward_16}}}
Cycle {{{Cycle_17}}}: {{{Reward_17}}}
Cycle {{{Cycle_18}}}: {{{Reward_18}}}
Cycle {{{Cycle_19}}}: {{{Reward_19}}}
Cycle {{{Cycle_20}}}: {{{Reward_20}}}

Notes: Sand Cake Sand Cake and Sand Glass Sand Glass are dropped by Sand Demon (Lv.28). Limestone Limestone, Garden Trowel Garden Trowel and Oasis Water Oasis Water are drilled in Desert Beach Fields.


Sandman - The Miracle of Sand


Sandman
Beach Town - Paradise
Image:Circle.gif
NPC: Sandman Location: Beach Town - Paradise
Base Experience: 57,072 TM Experience: 61,769
Request: Legendary Recipe, Glyph Tablet
Quest Cycles: 1 Time(s) Condition: Level 25+, have completed Sandman - Legendary Recipe
Cycle 1: Adventurer's Book, Weapon Ticket A
Cycle {{{Cycle_2}}}: {{{Reward_2}}}
Cycle {{{Cycle_3}}}: {{{Reward_3}}}
Cycle {{{Cycle_4}}}: {{{Reward_4}}}
Cycle {{{Cycle_5}}}: {{{Reward_5}}}
Cycle {{{Cycle_6}}}: {{{Reward_6}}}
Cycle {{{Cycle_7}}}: {{{Reward_7}}}
Cycle {{{Cycle_8}}}: {{{Reward_8}}}
Cycle {{{Cycle_9}}}: {{{Reward_9}}}
Cycle {{{Cycle_10}}}: {{{Reward_10}}}
Cycle {{{Cycle_11}}}: {{{Reward_11}}}
Cycle {{{Cycle_12}}}: {{{Reward_12}}}
Cycle {{{Cycle_13}}}: {{{Reward_13}}}
Cycle {{{Cycle_14}}}: {{{Reward_14}}}
Cycle {{{Cycle_15}}}: {{{Reward_15}}}
Cycle {{{Cycle_16}}}: {{{Reward_16}}}
Cycle {{{Cycle_17}}}: {{{Reward_17}}}
Cycle {{{Cycle_18}}}: {{{Reward_18}}}
Cycle {{{Cycle_19}}}: {{{Reward_19}}}
Cycle {{{Cycle_20}}}: {{{Reward_20}}}

Notes: Legendary Recipe Legendary Recipe is dropped by Sand Demon (Lv.28). Glyph Tablet Glyph Tablet is drilled in Pyramid Dungeon Halls.


Normal Quests

Monkey T - Monkey T's Loyalty - 2


Monkey T
Desert Beach Field 1 - Delta Island
Image:Circle.gif
NPC: Monkey T Location: Desert Beach Field 1 - Delta Island
Base Experience: None TM Experience: 19,593
Request: 5x Iron Grass
Quest Cycles: 25 Time(s) Condition: Level 20+
Cycle 1~25: 50 Galder Coupon, 100 Galder Coupon or 500 Galder Coupon
Cycle {{{Cycle_2}}}: {{{Reward_2}}}
Cycle {{{Cycle_3}}}: {{{Reward_3}}}
Cycle {{{Cycle_4}}}: {{{Reward_4}}}
Cycle {{{Cycle_5}}}: {{{Reward_5}}}
Cycle {{{Cycle_6}}}: {{{Reward_6}}}
Cycle {{{Cycle_7}}}: {{{Reward_7}}}
Cycle {{{Cycle_8}}}: {{{Reward_8}}}
Cycle {{{Cycle_9}}}: {{{Reward_9}}}
Cycle {{{Cycle_10}}}: {{{Reward_10}}}
Cycle {{{Cycle_11}}}: {{{Reward_11}}}
Cycle {{{Cycle_12}}}: {{{Reward_12}}}
Cycle {{{Cycle_13}}}: {{{Reward_13}}}
Cycle {{{Cycle_14}}}: {{{Reward_14}}}
Cycle {{{Cycle_15}}}: {{{Reward_15}}}
Cycle {{{Cycle_16}}}: {{{Reward_16}}}
Cycle {{{Cycle_17}}}: {{{Reward_17}}}
Cycle {{{Cycle_18}}}: {{{Reward_18}}}
Cycle {{{Cycle_19}}}: {{{Reward_19}}}
Cycle {{{Cycle_20}}}: {{{Reward_20}}}

Notes: Iron Grass Iron Grass is dropped by Shell Trap (Lv.19).


Star Gazer Stella (2) - The Star Gazer


Star Gazer Stella (2)
Desert Beach Field 2 - Sand Palace
Image:Circle.gif
NPC: Star Gazer Stella (2) Location: Desert Beach Field 2 - Sand Palace
Base Experience: 6,218 TM Experience: None
Request: Complete Don Giuvanni - Calming Down Don Giuvanni
Quest Cycles: 1 Time(s) Condition: Level 15+
Cycle 1: Star Card Pack No.5, Stars and Fortunes Book, liberate Star Gazing
Cycle {{{Cycle_2}}}: {{{Reward_2}}}
Cycle {{{Cycle_3}}}: {{{Reward_3}}}
Cycle {{{Cycle_4}}}: {{{Reward_4}}}
Cycle {{{Cycle_5}}}: {{{Reward_5}}}
Cycle {{{Cycle_6}}}: {{{Reward_6}}}
Cycle {{{Cycle_7}}}: {{{Reward_7}}}
Cycle {{{Cycle_8}}}: {{{Reward_8}}}
Cycle {{{Cycle_9}}}: {{{Reward_9}}}
Cycle {{{Cycle_10}}}: {{{Reward_10}}}
Cycle {{{Cycle_11}}}: {{{Reward_11}}}
Cycle {{{Cycle_12}}}: {{{Reward_12}}}
Cycle {{{Cycle_13}}}: {{{Reward_13}}}
Cycle {{{Cycle_14}}}: {{{Reward_14}}}
Cycle {{{Cycle_15}}}: {{{Reward_15}}}
Cycle {{{Cycle_16}}}: {{{Reward_16}}}
Cycle {{{Cycle_17}}}: {{{Reward_17}}}
Cycle {{{Cycle_18}}}: {{{Reward_18}}}
Cycle {{{Cycle_19}}}: {{{Reward_19}}}
Cycle {{{Cycle_20}}}: {{{Reward_20}}}

Notes: Pay attention to the dialogue when talking to Stella.


Don Giuvanni - Calming Down Don Giuvanni


Don Giuvanni
Desert Beach Field 2 - Sand Palace
Image:Circle.gif
NPC: Don Giuvanni Location: Desert Beach Field 2 - Sand Palace
Base Experience: 7,521 TM Experience: None
Request: Soap
Quest Cycles: 3 Time(s) Condition: Level 15+, have Stella - The Star Gazer in quest log
Cycle 1~2: 500 Galder Coupon
Cycle 3: Don Giuvanni Card
Cycle {{{Cycle_3}}}: {{{Reward_3}}}
Cycle {{{Cycle_4}}}: {{{Reward_4}}}
Cycle {{{Cycle_5}}}: {{{Reward_5}}}
Cycle {{{Cycle_6}}}: {{{Reward_6}}}
Cycle {{{Cycle_7}}}: {{{Reward_7}}}
Cycle {{{Cycle_8}}}: {{{Reward_8}}}
Cycle {{{Cycle_9}}}: {{{Reward_9}}}
Cycle {{{Cycle_10}}}: {{{Reward_10}}}
Cycle {{{Cycle_11}}}: {{{Reward_11}}}
Cycle {{{Cycle_12}}}: {{{Reward_12}}}
Cycle {{{Cycle_13}}}: {{{Reward_13}}}
Cycle {{{Cycle_14}}}: {{{Reward_14}}}
Cycle {{{Cycle_15}}}: {{{Reward_15}}}
Cycle {{{Cycle_16}}}: {{{Reward_16}}}
Cycle {{{Cycle_17}}}: {{{Reward_17}}}
Cycle {{{Cycle_18}}}: {{{Reward_18}}}
Cycle {{{Cycle_19}}}: {{{Reward_19}}}
Cycle {{{Cycle_20}}}: {{{Reward_20}}}


Vagabond Eloy - Eloy's Sensitive Skin (1)


Vagabond Eloy
Beach Town - Paradise
Image:Circle.gif
NPC: Vagabond Eloy Location: Beach Town - Paradise
Base Experience: 46,302 TM Experience: None
Request: 2x Sun Cream
Quest Cycles: 5 Time(s) Condition: Level 25+
Cycle 1~3: 3x Pink Potion C, 3x Blue Potion C
Cycle 4: 3x Pink Potion C, 3x Blue Potion C, Vagabond Eloy Card
Cycle 5: Desert Sticker
Cycle {{{Cycle_4}}}: {{{Reward_4}}}
Cycle {{{Cycle_5}}}: {{{Reward_5}}}
Cycle {{{Cycle_6}}}: {{{Reward_6}}}
Cycle {{{Cycle_7}}}: {{{Reward_7}}}
Cycle {{{Cycle_8}}}: {{{Reward_8}}}
Cycle {{{Cycle_9}}}: {{{Reward_9}}}
Cycle {{{Cycle_10}}}: {{{Reward_10}}}
Cycle {{{Cycle_11}}}: {{{Reward_11}}}
Cycle {{{Cycle_12}}}: {{{Reward_12}}}
Cycle {{{Cycle_13}}}: {{{Reward_13}}}
Cycle {{{Cycle_14}}}: {{{Reward_14}}}
Cycle {{{Cycle_15}}}: {{{Reward_15}}}
Cycle {{{Cycle_16}}}: {{{Reward_16}}}
Cycle {{{Cycle_17}}}: {{{Reward_17}}}
Cycle {{{Cycle_18}}}: {{{Reward_18}}}
Cycle {{{Cycle_19}}}: {{{Reward_19}}}
Cycle {{{Cycle_20}}}: {{{Reward_20}}}


Skipper Min - Dude Needs a Bath!


Skipper Min
Beach Town - Paradise
Image:Circle.gif
NPC: Skipper Min Location: Beach Town - Paradise
Base Experience: 46,302 TM Experience: None
Request: Soap, Shampoo, Bath Sponge
Quest Cycles: 5 Time(s) Condition: Level 25+
Cycle 1~3: 500 Galder Coupon
Cycle 4: 500 Galder Coupon, Skipper Min Card
Cycle 5: Harpoon Neo, Desert Sticker
Cycle {{{Cycle_4}}}: {{{Reward_4}}}
Cycle {{{Cycle_5}}}: {{{Reward_5}}}
Cycle {{{Cycle_6}}}: {{{Reward_6}}}
Cycle {{{Cycle_7}}}: {{{Reward_7}}}
Cycle {{{Cycle_8}}}: {{{Reward_8}}}
Cycle {{{Cycle_9}}}: {{{Reward_9}}}
Cycle {{{Cycle_10}}}: {{{Reward_10}}}
Cycle {{{Cycle_11}}}: {{{Reward_11}}}
Cycle {{{Cycle_12}}}: {{{Reward_12}}}
Cycle {{{Cycle_13}}}: {{{Reward_13}}}
Cycle {{{Cycle_14}}}: {{{Reward_14}}}
Cycle {{{Cycle_15}}}: {{{Reward_15}}}
Cycle {{{Cycle_16}}}: {{{Reward_16}}}
Cycle {{{Cycle_17}}}: {{{Reward_17}}}
Cycle {{{Cycle_18}}}: {{{Reward_18}}}
Cycle {{{Cycle_19}}}: {{{Reward_19}}}
Cycle {{{Cycle_20}}}: {{{Reward_20}}}

Notes: Soap Soap, Shampoo Shampoo and Bath Sponge Bath Sponge are drilled in Desert Beach Field 3.


Homeless Ian - This Generation's Last Romantic


Homeless Ian
Beach Town - Paradise
Image:Circle.gif
NPC: Homeless Ian Location: Beach Town - Paradise
Base Experience: 46,302 TM Experience: None
Request: 2x Flower Necklace
Quest Cycles: 5 Time(s) Condition: Level 25+
Cycle 1~3: Water Bucket
Cycle 4: Water Bucket, Homeless Ian Card
Cycle 5: Water Bucket, Desert Sticker
Cycle {{{Cycle_4}}}: {{{Reward_4}}}
Cycle {{{Cycle_5}}}: {{{Reward_5}}}
Cycle {{{Cycle_6}}}: {{{Reward_6}}}
Cycle {{{Cycle_7}}}: {{{Reward_7}}}
Cycle {{{Cycle_8}}}: {{{Reward_8}}}
Cycle {{{Cycle_9}}}: {{{Reward_9}}}
Cycle {{{Cycle_10}}}: {{{Reward_10}}}
Cycle {{{Cycle_11}}}: {{{Reward_11}}}
Cycle {{{Cycle_12}}}: {{{Reward_12}}}
Cycle {{{Cycle_13}}}: {{{Reward_13}}}
Cycle {{{Cycle_14}}}: {{{Reward_14}}}
Cycle {{{Cycle_15}}}: {{{Reward_15}}}
Cycle {{{Cycle_16}}}: {{{Reward_16}}}
Cycle {{{Cycle_17}}}: {{{Reward_17}}}
Cycle {{{Cycle_18}}}: {{{Reward_18}}}
Cycle {{{Cycle_19}}}: {{{Reward_19}}}
Cycle {{{Cycle_20}}}: {{{Reward_20}}}

Notes: Flower Necklace Flower Necklace is dropped by Sea Scorpion (Lv.22).


Bunny Maid - Well Watching Bunny Maid


Bunny Maid
Beach Town - Paradise
Image:Circle.gif
NPC: Bunny Maid Location: Beach Town - Paradise
Base Experience: 46,302 TM Experience: None
Request: Water Bucket, 2x Octopus Legs
Quest Cycles: 5 Time(s) Condition: Level 25+
Cycle 1~3: Filled Water Bucket
Cycle 4: Filled Water Bucket, Bunny Maid Card
Cycle 5: Filled Water Bucket, Desert Sticker
Cycle {{{Cycle_4}}}: {{{Reward_4}}}
Cycle {{{Cycle_5}}}: {{{Reward_5}}}
Cycle {{{Cycle_6}}}: {{{Reward_6}}}
Cycle {{{Cycle_7}}}: {{{Reward_7}}}
Cycle {{{Cycle_8}}}: {{{Reward_8}}}
Cycle {{{Cycle_9}}}: {{{Reward_9}}}
Cycle {{{Cycle_10}}}: {{{Reward_10}}}
Cycle {{{Cycle_11}}}: {{{Reward_11}}}
Cycle {{{Cycle_12}}}: {{{Reward_12}}}
Cycle {{{Cycle_13}}}: {{{Reward_13}}}
Cycle {{{Cycle_14}}}: {{{Reward_14}}}
Cycle {{{Cycle_15}}}: {{{Reward_15}}}
Cycle {{{Cycle_16}}}: {{{Reward_16}}}
Cycle {{{Cycle_17}}}: {{{Reward_17}}}
Cycle {{{Cycle_18}}}: {{{Reward_18}}}
Cycle {{{Cycle_19}}}: {{{Reward_19}}}
Cycle {{{Cycle_20}}}: {{{Reward_20}}}

Notes: Water Bucket Water Bucket is obtained by completing Homeless Ian - This Generation's Last Romantic. Octopus Legs Octopus Legs are dropped by Hula Octopus (Lv.25).


Al-Hauri - Help Al-Hauri


Al-Hauri
Paradise Spa
Image:Circle.gif
NPC: Al-Hauri Location: Paradise Spa
Base Experience: 46,302 TM Experience: None
Request: Filled Water Bucket
Quest Cycles: 5 Time(s) Condition: Level 25+
Cycle 1: 5x Pink Potion B
Cycle 2: 5x Blue Potion B
Cycle 3: 5x Pink Potion B, 5x Blue Potion B
Cycle 4: Al-Hauri Card
Cycle 5: Shell Shield Neo, Desert Sticker
Cycle {{{Cycle_6}}}: {{{Reward_6}}}
Cycle {{{Cycle_7}}}: {{{Reward_7}}}
Cycle {{{Cycle_8}}}: {{{Reward_8}}}
Cycle {{{Cycle_9}}}: {{{Reward_9}}}
Cycle {{{Cycle_10}}}: {{{Reward_10}}}
Cycle {{{Cycle_11}}}: {{{Reward_11}}}
Cycle {{{Cycle_12}}}: {{{Reward_12}}}
Cycle {{{Cycle_13}}}: {{{Reward_13}}}
Cycle {{{Cycle_14}}}: {{{Reward_14}}}
Cycle {{{Cycle_15}}}: {{{Reward_15}}}
Cycle {{{Cycle_16}}}: {{{Reward_16}}}
Cycle {{{Cycle_17}}}: {{{Reward_17}}}
Cycle {{{Cycle_18}}}: {{{Reward_18}}}
Cycle {{{Cycle_19}}}: {{{Reward_19}}}
Cycle {{{Cycle_20}}}: {{{Reward_20}}}


Eliza Bath - Eliza Bath's Curiousity


Eliza Bath
Paradise Spa
Image:Circle.gif
NPC: Eliza Bath Location: Paradise Spa
Base Experience: 46,302 TM Experience: None
Request: Lucky Letter, Cursed Letter, Love Letter, Confession Letter, Farewell Letter
Quest Cycles: 5 Time(s) Condition: Level 15+
Cycle 1~3: 500 Galder Coupon
Cycle 4: 500 Galder Coupon, Eliza Bath Card
Cycle 5: Octopus Hat Neo, Desert Sticker
Cycle {{{Cycle_4}}}: {{{Reward_4}}}
Cycle {{{Cycle_5}}}: {{{Reward_5}}}
Cycle {{{Cycle_6}}}: {{{Reward_6}}}
Cycle {{{Cycle_7}}}: {{{Reward_7}}}
Cycle {{{Cycle_8}}}: {{{Reward_8}}}
Cycle {{{Cycle_9}}}: {{{Reward_9}}}
Cycle {{{Cycle_10}}}: {{{Reward_10}}}
Cycle {{{Cycle_11}}}: {{{Reward_11}}}
Cycle {{{Cycle_12}}}: {{{Reward_12}}}
Cycle {{{Cycle_13}}}: {{{Reward_13}}}
Cycle {{{Cycle_14}}}: {{{Reward_14}}}
Cycle {{{Cycle_15}}}: {{{Reward_15}}}
Cycle {{{Cycle_16}}}: {{{Reward_16}}}
Cycle {{{Cycle_17}}}: {{{Reward_17}}}
Cycle {{{Cycle_18}}}: {{{Reward_18}}}
Cycle {{{Cycle_19}}}: {{{Reward_19}}}
Cycle {{{Cycle_20}}}: {{{Reward_20}}}


Miranda Watty - Miranda Watty's Hobbies


Miranda Watty
Beach Town - Paradise
Image:Circle.gif
NPC: Miranda Watty Location: Beach Town - Paradise
Base Experience: 46,302 TM Experience: None
Request: 2x Pineapple Mask
Quest Cycles: 5 Time(s) Condition: Level 25+
Cycle 1~3: 500 Galder Coupon
Cycle 4: 500 Galder Coupon, Miranda Watty Card
Cycle 5: Desert Sticker
Cycle {{{Cycle_4}}}: {{{Reward_4}}}
Cycle {{{Cycle_5}}}: {{{Reward_5}}}
Cycle {{{Cycle_6}}}: {{{Reward_6}}}
Cycle {{{Cycle_7}}}: {{{Reward_7}}}
Cycle {{{Cycle_8}}}: {{{Reward_8}}}
Cycle {{{Cycle_9}}}: {{{Reward_9}}}
Cycle {{{Cycle_10}}}: {{{Reward_10}}}
Cycle {{{Cycle_11}}}: {{{Reward_11}}}
Cycle {{{Cycle_12}}}: {{{Reward_12}}}
Cycle {{{Cycle_13}}}: {{{Reward_13}}}
Cycle {{{Cycle_14}}}: {{{Reward_14}}}
Cycle {{{Cycle_15}}}: {{{Reward_15}}}
Cycle {{{Cycle_16}}}: {{{Reward_16}}}
Cycle {{{Cycle_17}}}: {{{Reward_17}}}
Cycle {{{Cycle_18}}}: {{{Reward_18}}}
Cycle {{{Cycle_19}}}: {{{Reward_19}}}
Cycle {{{Cycle_20}}}: {{{Reward_20}}}

Notes: Pineapple Mask Pineapple Mask is dropped by Pineapple (Lv.24).


Sandman - Go to Megalopolis Square


Sandman
Beach Town - Paradise
Image:Circle.gif
NPC: Sandman Location: Beach Town - Paradise
Base Experience: 28,440 TM Experience: None
Request: Find and talk to Guild Clerk Esther
Quest Cycles: 1 Time(s) Condition: Level 25+, have completed Sandman - The Miracle of Sand
Cycle 1: 5x 500 Galder Coupon
Cycle {{{Cycle_2}}}: {{{Reward_2}}}
Cycle {{{Cycle_3}}}: {{{Reward_3}}}
Cycle {{{Cycle_4}}}: {{{Reward_4}}}
Cycle {{{Cycle_5}}}: {{{Reward_5}}}
Cycle {{{Cycle_6}}}: {{{Reward_6}}}
Cycle {{{Cycle_7}}}: {{{Reward_7}}}
Cycle {{{Cycle_8}}}: {{{Reward_8}}}
Cycle {{{Cycle_9}}}: {{{Reward_9}}}
Cycle {{{Cycle_10}}}: {{{Reward_10}}}
Cycle {{{Cycle_11}}}: {{{Reward_11}}}
Cycle {{{Cycle_12}}}: {{{Reward_12}}}
Cycle {{{Cycle_13}}}: {{{Reward_13}}}
Cycle {{{Cycle_14}}}: {{{Reward_14}}}
Cycle {{{Cycle_15}}}: {{{Reward_15}}}
Cycle {{{Cycle_16}}}: {{{Reward_16}}}
Cycle {{{Cycle_17}}}: {{{Reward_17}}}
Cycle {{{Cycle_18}}}: {{{Reward_18}}}
Cycle {{{Cycle_19}}}: {{{Reward_19}}}
Cycle {{{Cycle_20}}}: {{{Reward_20}}}


Pharaoh Boy - Young Pharaoh's Request


Pharaoh Boy
Desert Beach Field 3 - Statue of Anubis
Image:Circle.gif
NPC: Pharaoh Boy Location: Desert Beach Field 3 - Statue of Anubis
Base Experience: 46,302 TM Experience: None
Request: Uraeus Statue, Nekhbet Statue, Round Bone Seal
Quest Cycles: 5 Time(s) Condition: Level 25+, haven't Pharaoh Hat, Golden Sword, Golden Lion Shield in inventory
Cycle 1: 500 Galder Coupon
Cycle 2: 2x 500 Galder Coupon
Cycle 3: 3x 500 Galder Coupon
Cycle 4: 4x 500 Galder Coupon
Cycle 5: Pharaoh Boy Card
Cycle {{{Cycle_6}}}: {{{Reward_6}}}
Cycle {{{Cycle_7}}}: {{{Reward_7}}}
Cycle {{{Cycle_8}}}: {{{Reward_8}}}
Cycle {{{Cycle_9}}}: {{{Reward_9}}}
Cycle {{{Cycle_10}}}: {{{Reward_10}}}
Cycle {{{Cycle_11}}}: {{{Reward_11}}}
Cycle {{{Cycle_12}}}: {{{Reward_12}}}
Cycle {{{Cycle_13}}}: {{{Reward_13}}}
Cycle {{{Cycle_14}}}: {{{Reward_14}}}
Cycle {{{Cycle_15}}}: {{{Reward_15}}}
Cycle {{{Cycle_16}}}: {{{Reward_16}}}
Cycle {{{Cycle_17}}}: {{{Reward_17}}}
Cycle {{{Cycle_18}}}: {{{Reward_18}}}
Cycle {{{Cycle_19}}}: {{{Reward_19}}}
Cycle {{{Cycle_20}}}: {{{Reward_20}}}


Eclipse - The Story of the Gods 2


Eclipse
Beach Town - Paradise
Image:Circle.gif
NPC: Eclipse Location: Beach Town - Paradise
Base Experience: 6,665,873 TM Experience: 4,382,786
Request: 3x Shadow Anchor
Quest Cycles: 1 Time(s) Condition: Level 195+, use Mind's Eye, have completed The Story of the Gods 1 and have completed Shadow Star 2 at least once
Cycle 1: 10,000 Galder Coupon
Cycle {{{Cycle_2}}}: {{{Reward_2}}}
Cycle {{{Cycle_3}}}: {{{Reward_3}}}
Cycle {{{Cycle_4}}}: {{{Reward_4}}}
Cycle {{{Cycle_5}}}: {{{Reward_5}}}
Cycle {{{Cycle_6}}}: {{{Reward_6}}}
Cycle {{{Cycle_7}}}: {{{Reward_7}}}
Cycle {{{Cycle_8}}}: {{{Reward_8}}}
Cycle {{{Cycle_9}}}: {{{Reward_9}}}
Cycle {{{Cycle_10}}}: {{{Reward_10}}}
Cycle {{{Cycle_11}}}: {{{Reward_11}}}
Cycle {{{Cycle_12}}}: {{{Reward_12}}}
Cycle {{{Cycle_13}}}: {{{Reward_13}}}
Cycle {{{Cycle_14}}}: {{{Reward_14}}}
Cycle {{{Cycle_15}}}: {{{Reward_15}}}
Cycle {{{Cycle_16}}}: {{{Reward_16}}}
Cycle {{{Cycle_17}}}: {{{Reward_17}}}
Cycle {{{Cycle_18}}}: {{{Reward_18}}}
Cycle {{{Cycle_19}}}: {{{Reward_19}}}
Cycle {{{Cycle_20}}}: {{{Reward_20}}}


Blacksmith Marx - Collection!


Blacksmith Marx
Desert Beach Mine - Crystal Copper
Image:Circle.gif
NPC: Blacksmith Marx Location: Desert Beach Mine - Crystal Copper
Base Experience: 51,447 TM Experience: None
Request: 3x Pure Tin, 3x Flawless Amethyst
Quest Cycles: 5 Time(s) Condition: Level 25+
Cycle 1~4: Tornado Stone, 2~4x 500 Galder Coupon or 4~5x Pink Potion C
Cycle 5: 2x Pure Sulfur, 2x Flawless Agate
Cycle {{{Cycle_3}}}: {{{Reward_3}}}
Cycle {{{Cycle_4}}}: {{{Reward_4}}}
Cycle {{{Cycle_5}}}: {{{Reward_5}}}
Cycle {{{Cycle_6}}}: {{{Reward_6}}}
Cycle {{{Cycle_7}}}: {{{Reward_7}}}
Cycle {{{Cycle_8}}}: {{{Reward_8}}}
Cycle {{{Cycle_9}}}: {{{Reward_9}}}
Cycle {{{Cycle_10}}}: {{{Reward_10}}}
Cycle {{{Cycle_11}}}: {{{Reward_11}}}
Cycle {{{Cycle_12}}}: {{{Reward_12}}}
Cycle {{{Cycle_13}}}: {{{Reward_13}}}
Cycle {{{Cycle_14}}}: {{{Reward_14}}}
Cycle {{{Cycle_15}}}: {{{Reward_15}}}
Cycle {{{Cycle_16}}}: {{{Reward_16}}}
Cycle {{{Cycle_17}}}: {{{Reward_17}}}
Cycle {{{Cycle_18}}}: {{{Reward_18}}}
Cycle {{{Cycle_19}}}: {{{Reward_19}}}
Cycle {{{Cycle_20}}}: {{{Reward_20}}}


Nefertiti 1 - Canopic Jar


Nefertiti 1
Pyramid Dungeon 6 - Hall of the Queen
Image:Circle.gif
NPC: Nefertiti 1 Location: Pyramid Dungeon 6 - Hall of the Queen
Base Experience: 51,447 TM Experience: None
Request: 3x Harpy, 3x Imsety, 3x Duamutef, 3x Qebehsenuef
Quest Cycles: 5 Time(s) Condition: Level 25~80
Cycle 1: 10x Pink Potion C, 10x Blue Potion C
Cycle 2: 15x Pink Potion C, 15x Blue Potion C
Cycle 3: 20x Pink Potion C, 20x Blue Potion C
Cycle 4: 25x Pink Potion C, 25x Blue Potion C
Cycle 5: Nefertiti Card
Cycle {{{Cycle_6}}}: {{{Reward_6}}}
Cycle {{{Cycle_7}}}: {{{Reward_7}}}
Cycle {{{Cycle_8}}}: {{{Reward_8}}}
Cycle {{{Cycle_9}}}: {{{Reward_9}}}
Cycle {{{Cycle_10}}}: {{{Reward_10}}}
Cycle {{{Cycle_11}}}: {{{Reward_11}}}
Cycle {{{Cycle_12}}}: {{{Reward_12}}}
Cycle {{{Cycle_13}}}: {{{Reward_13}}}
Cycle {{{Cycle_14}}}: {{{Reward_14}}}
Cycle {{{Cycle_15}}}: {{{Reward_15}}}
Cycle {{{Cycle_16}}}: {{{Reward_16}}}
Cycle {{{Cycle_17}}}: {{{Reward_17}}}
Cycle {{{Cycle_18}}}: {{{Reward_18}}}
Cycle {{{Cycle_19}}}: {{{Reward_19}}}
Cycle {{{Cycle_20}}}: {{{Reward_20}}}

Notes: Harpy Harpy, Imsety Imsety, Duamutef Duamutef, and Qebehsenuef Qebehsenuef are drilled in Pyramid Dungeon.


Daily Quests

Monkey T - Spring's Daily Desert Beach


Monkey T
Beach Town - Paradise
Image:Circle.gif
NPC: Monkey T Location: Beach Town - Paradise
Base Experience: None TM Experience: 16,421
Request: Sleeping Socks
Quest Cycles: 1 Time Condition: Level 20+
Cycle 1: Daily Coupon and 5x Half Pink Potion, 5x Half Blue Potion, 10x 500 Galder Coupon, or Sharp Dirk
Cycle {{{Cycle_2}}}: {{{Reward_2}}}
Cycle {{{Cycle_3}}}: {{{Reward_3}}}
Cycle {{{Cycle_4}}}: {{{Reward_4}}}
Cycle {{{Cycle_5}}}: {{{Reward_5}}}
Cycle {{{Cycle_6}}}: {{{Reward_6}}}
Cycle {{{Cycle_7}}}: {{{Reward_7}}}
Cycle {{{Cycle_8}}}: {{{Reward_8}}}
Cycle {{{Cycle_9}}}: {{{Reward_9}}}
Cycle {{{Cycle_10}}}: {{{Reward_10}}}
Cycle {{{Cycle_11}}}: {{{Reward_11}}}
Cycle {{{Cycle_12}}}: {{{Reward_12}}}
Cycle {{{Cycle_13}}}: {{{Reward_13}}}
Cycle {{{Cycle_14}}}: {{{Reward_14}}}
Cycle {{{Cycle_15}}}: {{{Reward_15}}}
Cycle {{{Cycle_16}}}: {{{Reward_16}}}
Cycle {{{Cycle_17}}}: {{{Reward_17}}}
Cycle {{{Cycle_18}}}: {{{Reward_18}}}
Cycle {{{Cycle_19}}}: {{{Reward_19}}}
Cycle {{{Cycle_20}}}: {{{Reward_20}}}

Notes: Sleeping Socks Sleeping Socks is dropped by Punisher Cannon Shell (Lv.38). In next season the request will be Scorching Heat.


Keeper Julio - Julio's Storage Mission 1


Keeper Julio
Gate of Desert Beach
Image:Circle.gif
NPC: Keeper Julio Location: Gate of Desert Beach
Quest Cycles: Daily Condition: Level 20+
Request Reward TM
Crystal 500 Galder Coupon Chaos's Feather 20
10x 2x 14,928
20x 3x 32,842
40x 4x 74,640
60x 5x 104,496
80x 6x 134,352
100x 7x 1x 179,136

Notes: Crystal Crystal is drilled in Coral Beach and Desert Beach Fields.


Stella - Shadow Star 2


Stella
Beach Town - Paradise
Image:Circle.gif
NPC: Stella Location: Beach Town - Paradise
Base Experience: 2,190,586 TM Experience: None
Request: 5x Talisman of Darkness
Quest Cycles: 1 Time(s) Condition: Level 195+, use Mind's Eye
Cycle 1: Star Card Pack No.5, 5x Half Pink Potion, 5x Half Blue Potion or Story of the Star Gazer Girl 2
Cycle {{{Cycle_2}}}: {{{Reward_2}}}
Cycle {{{Cycle_3}}}: {{{Reward_3}}}
Cycle {{{Cycle_4}}}: {{{Reward_4}}}
Cycle {{{Cycle_5}}}: {{{Reward_5}}}
Cycle {{{Cycle_6}}}: {{{Reward_6}}}
Cycle {{{Cycle_7}}}: {{{Reward_7}}}
Cycle {{{Cycle_8}}}: {{{Reward_8}}}
Cycle {{{Cycle_9}}}: {{{Reward_9}}}
Cycle {{{Cycle_10}}}: {{{Reward_10}}}
Cycle {{{Cycle_11}}}: {{{Reward_11}}}
Cycle {{{Cycle_12}}}: {{{Reward_12}}}
Cycle {{{Cycle_13}}}: {{{Reward_13}}}
Cycle {{{Cycle_14}}}: {{{Reward_14}}}
Cycle {{{Cycle_15}}}: {{{Reward_15}}}
Cycle {{{Cycle_16}}}: {{{Reward_16}}}
Cycle {{{Cycle_17}}}: {{{Reward_17}}}
Cycle {{{Cycle_18}}}: {{{Reward_18}}}
Cycle {{{Cycle_19}}}: {{{Reward_19}}}
Cycle {{{Cycle_20}}}: {{{Reward_20}}}

Notes: Talisman of Darkness Talisman of Darkness is dropped by Shadow Shell Trap (Lv.352), Shadow Golden Mole (Lv.353), Shadow Fanta Fish (Lv.354), Shadow Sand Demon (Lv.356), Shadow Pineapple (Lv.358), Shadow Fan Lizard (Lv.359) and Shadow Cannon Shell (Lv.360).


Monster Quests

Hunter Yuri - Desert Beach Monster Quest


Hunter Yuri
Paradise Monster Guild
Image:Circle.gif
NPC: Hunter Yuri Location: Paradise Monster Guild
Quest Cycles: Each 5 Time(s) Condition: Level 15+
Level Request Reward Base / TM
15~20 5x Golden Mole (Lv.20) in 10 min 3x 100 Galder Coupon 3,935 / 1,080
21~25 10x Pineapple (Lv.24) in 15 min 3x 100 Galder Coupon 9,077 / 2,644
26~33 15x Cannon Shell (Lv.33) in 20 min 3x 100 Galder Coupon 15,628 / 4,869
34~40 20x Gold G (Lv.36) in 25 min 5x 100 Galder Coupon 30,305 / 12,428
41+ 30x Rotten Mummy (Lv.43) in 30 min 5x 100 Galder Coupon 49,340 / 22,561
Found at:
Golden Mole is found at Desert Beach Field 1 - Delta Island.

Pineapple is found at Desert Beach Field 3 - Statue of Anubis.

Cannon Shell is found at Desert Beach Field 4 - Parasol River.

Gold G is found at Pyramid Dungeon 3 / 5.

Rotten Mummy is found at Pyramid Dungeon 4 / 5 / 6.

Notes: {{{Notes}}}


Assistant Hunter - Assistant Hunter's Mission in Paradise


Assistant Hunter
Paradise Monster Guild
Image:Circle.gif
NPC: Assistant Hunter Location: Paradise Monster Guild
Quest Cycles: Each 5 Time(s) Condition: Level 20+, have completed Hunter Yuri - Desert Beach Monster Quest at least once
Level Request Reward Base / TM
20+ 5x Grumpy Octopus (Lv.29) in 10 min 500 Galder Coupon 5,354 / 5,312
{{{Level_2}}} {{{Qt_2}}}x [[{{{Monster_2}}}]] (Lv.{{{LvM_2}}}) in {{{Time_2}}} {{{Reward_2}}} {{{Exp_2}}}
{{{Level_3}}} {{{Qt_3}}}x [[{{{Monster_3}}}]] (Lv.{{{LvM_3}}}) in {{{Time_3}}} {{{Reward_3}}} {{{Exp_3}}}
{{{Level_4}}} {{{Qt_4}}}x [[{{{Monster_4}}}]] (Lv.{{{LvM_4}}}) in {{{Time_4}}} {{{Reward_4}}} {{{Exp_4}}}
{{{Level_5}}} {{{Qt_5}}}x [[{{{Monster_5}}}]] (Lv.{{{LvM_5}}}) in {{{Time_5}}} {{{Reward_5}}} {{{Exp_5}}}
Found at:
Grumpy Octopus is found at Desert Beach Field 2 - Sand Palace.
Grumpy Octopus

Notes: {{{Notes}}}


Love Hunter Robin - Love Hunter from Pyramid Dungeon


Love Hunter Robin
Pyramid Dungeon 1 - Hall of the Slave
Image:Circle.gif
NPC: Love Hunter Robin Location: Pyramid Dungeon 1 - Hall of the Slave
Quest Cycles: Each 5 Time(s) Condition: Level 25+
Level Request Reward TM
25~35 20x Oran G (Lv.30) in 20 min 2x 500 Galder Coupon 14,878
36~40 20x Uraeus (Lv.34) in 20 min 2x 500 Galder Coupon 30,646
41~45 20x Seth (Lv.45) in 20 min 2x 500 Galder Coupon 51,796
46+ 20x Queen Mummy (Lv.49) in 20 min 3x 500 Galder Coupon 104,179
{{{Level_5}}} {{{Qt_5}}}x [[{{{Monster_5}}}]] (Lv.{{{LvM_5}}}) in {{{Time_5}}} {{{Reward_5}}} {{{Exp_5}}}
Found at:
Oran G is found at Pyramid Dungeon 1 - Hall of the Slave.

Uraeus is found at Pyramid Dungeon 2 - Hall of Harpy.

Seth is found at Pyramid Dungeon 4 / 5.

Queen Mummy is found at Pyramid Dungeon 6 - Hall of the Queen.


Notes: {{{Notes}}}


Monster Daily Quests

Hunter Yuri - Desert Beach Hunter Girl


Hunter Yuri
Gate of Desert Beach
Image:Circle.gif
NPC: Hunter Yuri Location: Gate of Desert Beach
Quest Cycles: Each 1 Time(s) Condition: Level 10+
Level Request Reward Base / TM
10+ 15x Fanta Slime (Lv.18) in 15 min Hunter Girl's Thank You Gift 2,308 / 721
{{{Level_2}}} {{{Qt_2}}}x [[{{{Monster_2}}}]] (Lv.{{{LvM_2}}}) in {{{Time_2}}} {{{Reward_2}}} {{{Exp_2}}}
{{{Level_3}}} {{{Qt_3}}}x [[{{{Monster_3}}}]] (Lv.{{{LvM_3}}}) in {{{Time_3}}} {{{Reward_3}}} {{{Exp_3}}}
{{{Level_4}}} {{{Qt_4}}}x [[{{{Monster_4}}}]] (Lv.{{{LvM_4}}}) in {{{Time_4}}} {{{Reward_4}}} {{{Exp_4}}}
{{{Level_5}}} {{{Qt_5}}}x [[{{{Monster_5}}}]] (Lv.{{{LvM_5}}}) in {{{Time_5}}} {{{Reward_5}}} {{{Exp_5}}}
Found at:
Fanta Slime is found at Desert Beach Field 1 - Delta Island.
Fanta Slime

Notes: {{{Notes}}}


Hunter Yuri - Paradise Hunter Girl


Hunter Yuri
Desert Beach Field 3 - Statue of Anubis
Image:Circle.gif
NPC: Hunter Yuri Location: Desert Beach Field 3 - Statue of Anubis
Quest Cycles: Each 1 Time(s) Condition: Level 20+
Level Request Reward Base / TM
20+ 15x Sand Demon (Lv.28) in 15 min Hunter Girl's Happy Gift 12,647 / 3,584
{{{Level_2}}} {{{Qt_2}}}x [[{{{Monster_2}}}]] (Lv.{{{LvM_2}}}) in {{{Time_2}}} {{{Reward_2}}} {{{Exp_2}}}
{{{Level_3}}} {{{Qt_3}}}x [[{{{Monster_3}}}]] (Lv.{{{LvM_3}}}) in {{{Time_3}}} {{{Reward_3}}} {{{Exp_3}}}
{{{Level_4}}} {{{Qt_4}}}x [[{{{Monster_4}}}]] (Lv.{{{LvM_4}}}) in {{{Time_4}}} {{{Reward_4}}} {{{Exp_4}}}
{{{Level_5}}} {{{Qt_5}}}x [[{{{Monster_5}}}]] (Lv.{{{LvM_5}}}) in {{{Time_5}}} {{{Reward_5}}} {{{Exp_5}}}
Found at:
Sand Demon is found at Desert Beach Field 3 - Statue of Anubis.
Sand Demon

Notes: {{{Notes}}}


Shaman Girl Jia - Dark Spirit Punishment 2


Shaman Girl Jia
Beach Town - Paradise
Image:Circle.gif
NPC: Shaman Girl Jia Location: Beach Town - Paradise
Quest Cycles: Each 1 Time(s) Condition: Level 195+, Mind's Eye
Level Request Reward Base / TM
195~198 3x Shadow Fanta Slime (Lv.351) in 12 min 3x Half Pink Potion, 3x Half Blue Potion 958,120 / 179,988
199~202 3x Shadow Hula Octopus (Lv.355) in 12 min 3x Half Pink Potion, 3x Half Blue Potion 1,005,645 / 186,380
203~205 3x Shadow Sea Scorpion (Lv.357) in 11 min 3x Half Pink Potion, 3x Half Blue Potion 1,052,078 / 194,400
206~209 3x Shadow Oran G (Lv.362) in 11 min 3x Half Pink Potion, 3x Half Blue Potion 1,092,103 / 201,089
210+ 3x Shadow Basic Mummy (Lv.370) in 10 min 3x Half Pink Potion, 3x Half Blue Potion 1,148,693 / 210,217
Found at:
Shadow Fanta Slime is found at Desert Beach Field 1 - Delta Island.

Shadow Hula Octopus is found at Desert Beach Field 2 - Sand Palace.

Shadow Sea Scorpion is found at Desert Beach Field 3 - Statue of Anubis.

Shadow Oran G is found at Pyramid Dungeon 1 - Hall of the Slave.

Shadow Basic Mummy is found at Pyramid Dungeon 3 / 4 / 6.

Notes: {{{Notes}}}


Party Quests

Officer Tera - Desert Beach Party Quest (Field)


Image:Officer Tera.gif
Paradise Monster Guild
Image:Circle.gif
NPC: Officer Tera Location: Paradise Monster Guild
Monster: Pineapple (Lv.24) Condition: Level 15+, all party members must be in Paradise Monster Guild.
Party Members Amount of Monsters Time Reward Base / TM
2 90x in 20 min 2x 500 Galder Coupon ~ / ~
3 135x
4 180x
5 225x
6 270x
Found at:
Pineapple is found at Desert Beach Field 3 - Statue of Anubis. Pineapple
Notes: Amount of experience fluctuates (depends mostly on the number of kills).


Officer Tera - Desert Beach Party Quest (Dungeon)


Image:Officer Tera.gif
Paradise Monster Guild
Image:Circle.gif
NPC: Officer Tera Location: Paradise Monster Guild
Monster: Rotten Mummy (Lv.43) Condition: Level 25+, all party members must be in Paradise Monster Guild.
Party Members Amount of Monsters Time Reward Base / TM
2 64x in 20 min Chaos's Feather 20 ~ / ~
3 96x
4 128x
5 160x
6 192x
Found at:
Rotten Mummy is found at Pyramid Dungeon 4 / 5 / 6. Rotten Mummy
Notes: Amount of experience fluctuates (depends mostly on the number of kills).


Officer Tera - Crystal Copper Party Quest


Image:Officer Tera.gif
Desert Beach Mine - Crystal Copper
Image:Circle.gif
NPC: Officer Tera Location: Desert Beach Mine - Crystal Copper
Monster: Kira (Lv.180) Condition: Level 120~149, all party members must be in Desert Beach Mine - Crystal Copper.
Party Members Amount of Monsters Time Reward Base / TM
2 8x in 10 min 10,000 Galder Coupon, 3x Chaos's Feather 95, 3x Chaos's Feather 110, or 3x Chaos's Feather 125 ~ / ~
3 12x
4 16x
5 20x
6 24x
Found at:
Kira is found at 2nd Closed Lot of Crystal Copper. Kira
Notes: Amount of experience fluctuates (depends mostly on the number of kills).


Card Quests

Card Girl - Desert Beach Card Girl Quest (1)


Card Girl
Gate of Desert Beach
Image:Circle.gif
NPC: Card Girl Location: Gate of Desert Beach
Base Experience: None TM Experience: 8,577
Request: Unknown Item
Quest Cycles: 1 Time(s) Condition: Level 10+
Cycle 1: Arcana Smart Card
Cycle {{{Cycle_2}}}: {{{Reward_2}}}
Cycle {{{Cycle_3}}}: {{{Reward_3}}}
Cycle {{{Cycle_4}}}: {{{Reward_4}}}
Cycle {{{Cycle_5}}}: {{{Reward_5}}}
Cycle {{{Cycle_6}}}: {{{Reward_6}}}
Cycle {{{Cycle_7}}}: {{{Reward_7}}}
Cycle {{{Cycle_8}}}: {{{Reward_8}}}
Cycle {{{Cycle_9}}}: {{{Reward_9}}}
Cycle {{{Cycle_10}}}: {{{Reward_10}}}
Cycle {{{Cycle_11}}}: {{{Reward_11}}}
Cycle {{{Cycle_12}}}: {{{Reward_12}}}
Cycle {{{Cycle_13}}}: {{{Reward_13}}}
Cycle {{{Cycle_14}}}: {{{Reward_14}}}
Cycle {{{Cycle_15}}}: {{{Reward_15}}}
Cycle {{{Cycle_16}}}: {{{Reward_16}}}
Cycle {{{Cycle_17}}}: {{{Reward_17}}}
Cycle {{{Cycle_18}}}: {{{Reward_18}}}
Cycle {{{Cycle_19}}}: {{{Reward_19}}}
Cycle {{{Cycle_20}}}: {{{Reward_20}}}

Notes: "Unknown Item" is Sea Scorpion Card Sea Scorpion Card, that is dropped by Sea Scorpion (Lv.22). The riddle is: "Claw dances with sand under scorching sun".


Card Girl - Desert Beach Card Girl Quest (2)


Card Girl
Gate of Desert Beach
Image:Circle.gif
NPC: Card Girl Location: Gate of Desert Beach
Base Experience: None TM Experience: 19,920
Request: Unknown Item
Quest Cycles: 1 Time(s) Condition: Level 15+
Cycle 1: 2x Arcana Smart Card
Cycle {{{Cycle_2}}}: {{{Reward_2}}}
Cycle {{{Cycle_3}}}: {{{Reward_3}}}
Cycle {{{Cycle_4}}}: {{{Reward_4}}}
Cycle {{{Cycle_5}}}: {{{Reward_5}}}
Cycle {{{Cycle_6}}}: {{{Reward_6}}}
Cycle {{{Cycle_7}}}: {{{Reward_7}}}
Cycle {{{Cycle_8}}}: {{{Reward_8}}}
Cycle {{{Cycle_9}}}: {{{Reward_9}}}
Cycle {{{Cycle_10}}}: {{{Reward_10}}}
Cycle {{{Cycle_11}}}: {{{Reward_11}}}
Cycle {{{Cycle_12}}}: {{{Reward_12}}}
Cycle {{{Cycle_13}}}: {{{Reward_13}}}
Cycle {{{Cycle_14}}}: {{{Reward_14}}}
Cycle {{{Cycle_15}}}: {{{Reward_15}}}
Cycle {{{Cycle_16}}}: {{{Reward_16}}}
Cycle {{{Cycle_17}}}: {{{Reward_17}}}
Cycle {{{Cycle_18}}}: {{{Reward_18}}}
Cycle {{{Cycle_19}}}: {{{Reward_19}}}
Cycle {{{Cycle_20}}}: {{{Reward_20}}}

Notes: "Unknown Item" is Sand Demon Card Sand Demon Card, that is dropped by Sand Demon (Lv.28). The riddle is: "The sand falls, piling on time".


Card Girl - Desert Beach Card Girl Quest (3)


Card Girl
Gate of Desert Beach
Image:Circle.gif
NPC: Card Girl Location: Gate of Desert Beach
Base Experience: None TM Experience: 79,191
Request: Unknown Item, Unknown Item
Quest Cycles: 1 Time(s) Condition: Level 25+
Cycle 1: 3x Arcana Smart Card
Cycle {{{Cycle_2}}}: {{{Reward_2}}}
Cycle {{{Cycle_3}}}: {{{Reward_3}}}
Cycle {{{Cycle_4}}}: {{{Reward_4}}}
Cycle {{{Cycle_5}}}: {{{Reward_5}}}
Cycle {{{Cycle_6}}}: {{{Reward_6}}}
Cycle {{{Cycle_7}}}: {{{Reward_7}}}
Cycle {{{Cycle_8}}}: {{{Reward_8}}}
Cycle {{{Cycle_9}}}: {{{Reward_9}}}
Cycle {{{Cycle_10}}}: {{{Reward_10}}}
Cycle {{{Cycle_11}}}: {{{Reward_11}}}
Cycle {{{Cycle_12}}}: {{{Reward_12}}}
Cycle {{{Cycle_13}}}: {{{Reward_13}}}
Cycle {{{Cycle_14}}}: {{{Reward_14}}}
Cycle {{{Cycle_15}}}: {{{Reward_15}}}
Cycle {{{Cycle_16}}}: {{{Reward_16}}}
Cycle {{{Cycle_17}}}: {{{Reward_17}}}
Cycle {{{Cycle_18}}}: {{{Reward_18}}}
Cycle {{{Cycle_19}}}: {{{Reward_19}}}
Cycle {{{Cycle_20}}}: {{{Reward_20}}}

Notes: The 1st "Unknown Item" is Nephthys Card Nephthys Card, that is dropped by Nephthys (Lv.38). The 2nd "Unknown Item" is Isis Card Isis Card, that is dropped by Isis (Lv.42). The riddle is: "The wind blows south. We're the wings that protect our dormant king".


Card Girl - Desert Beach Card Girl Quest (4)


Card Girl
Gate of Desert Beach
Image:Circle.gif
NPC: Card Girl Location: Gate of Desert Beach
Base Experience: None TM Experience: 79,191
Request: Unknown Item
Quest Cycles: 1 Time(s) Condition: Level ?+
Cycle 1: 4x Arcana Smart Card
Cycle {{{Cycle_2}}}: {{{Reward_2}}}
Cycle {{{Cycle_3}}}: {{{Reward_3}}}
Cycle {{{Cycle_4}}}: {{{Reward_4}}}
Cycle {{{Cycle_5}}}: {{{Reward_5}}}
Cycle {{{Cycle_6}}}: {{{Reward_6}}}
Cycle {{{Cycle_7}}}: {{{Reward_7}}}
Cycle {{{Cycle_8}}}: {{{Reward_8}}}
Cycle {{{Cycle_9}}}: {{{Reward_9}}}
Cycle {{{Cycle_10}}}: {{{Reward_10}}}
Cycle {{{Cycle_11}}}: {{{Reward_11}}}
Cycle {{{Cycle_12}}}: {{{Reward_12}}}
Cycle {{{Cycle_13}}}: {{{Reward_13}}}
Cycle {{{Cycle_14}}}: {{{Reward_14}}}
Cycle {{{Cycle_15}}}: {{{Reward_15}}}
Cycle {{{Cycle_16}}}: {{{Reward_16}}}
Cycle {{{Cycle_17}}}: {{{Reward_17}}}
Cycle {{{Cycle_18}}}: {{{Reward_18}}}
Cycle {{{Cycle_19}}}: {{{Reward_19}}}
Cycle {{{Cycle_20}}}: {{{Reward_20}}}

Notes: "Unknown Item" is Shell Trap Card Shell Trap Card, that is dropped by Shell Trap (Lv.19). The riddle is: "Its cute face is hidden behind its sharp teeth".


Card Girl - Desert Beach Card Girl Quest (5)


Card Girl
Gate of Desert Beach
Image:Circle.gif
NPC: Card Girl Location: Gate of Desert Beach
Base Experience: None TM Experience: 79,191
Request: Unknown Item
Quest Cycles: 1 Time(s) Condition: Level ?+
Cycle 1: 5x Arcana Smart Card
Cycle {{{Cycle_2}}}: {{{Reward_2}}}
Cycle {{{Cycle_3}}}: {{{Reward_3}}}
Cycle {{{Cycle_4}}}: {{{Reward_4}}}
Cycle {{{Cycle_5}}}: {{{Reward_5}}}
Cycle {{{Cycle_6}}}: {{{Reward_6}}}
Cycle {{{Cycle_7}}}: {{{Reward_7}}}
Cycle {{{Cycle_8}}}: {{{Reward_8}}}
Cycle {{{Cycle_9}}}: {{{Reward_9}}}
Cycle {{{Cycle_10}}}: {{{Reward_10}}}
Cycle {{{Cycle_11}}}: {{{Reward_11}}}
Cycle {{{Cycle_12}}}: {{{Reward_12}}}
Cycle {{{Cycle_13}}}: {{{Reward_13}}}
Cycle {{{Cycle_14}}}: {{{Reward_14}}}
Cycle {{{Cycle_15}}}: {{{Reward_15}}}
Cycle {{{Cycle_16}}}: {{{Reward_16}}}
Cycle {{{Cycle_17}}}: {{{Reward_17}}}
Cycle {{{Cycle_18}}}: {{{Reward_18}}}
Cycle {{{Cycle_19}}}: {{{Reward_19}}}
Cycle {{{Cycle_20}}}: {{{Reward_20}}}

Notes: "Unknown Item" is Fan Lizard Card Fan Lizard Card, that is dropped by Fan Lizard (Lv.26). The riddle is: "It's this hot, and it still has a muffler on".


Transfers

Rosemary - Transfer to the Hall of the Queen


Rosemary
Pyramid Dungeon 5 - Hall of Love Affair
Image:Circle.gif
NPC: Rosemary Location: Pyramid Dungeon 5 - Hall of Love Affair
Request: Apron (consumed)
Condition: Level 1~90
Transfer to: Pyramid Dungeon 6 - Hall of the Queen

Notes: Apron Apron is dropped by Addax (Lv.18). Addax can be found in Coral Beach - Dark Cave.


Surprise Spot Quests

Driller King Marky - Romance of Drilling - Desert Beach


Driller King Marky
Desert Beach Field 4 - Parasol River
Image:Circle.gif
NPC: Driller King Marky Location: Desert Beach Field 4 - Parasol River
Base Experience: 2,656 TM Experience: 2,656
Request: Weird Beach Map A, Weird Beach Map B
Quest Cycles: 1 Time(s) Condition: Level 15~115, have completed Indiana John - Old Man's Dream
Cycle 1: Weird Beach Treasure Map
Cycle {{{Cycle_2}}}: {{{Reward_2}}}
Cycle {{{Cycle_3}}}: {{{Reward_3}}}
Cycle {{{Cycle_4}}}: {{{Reward_4}}}
Cycle {{{Cycle_5}}}: {{{Reward_5}}}
Cycle {{{Cycle_6}}}: {{{Reward_6}}}
Cycle {{{Cycle_7}}}: {{{Reward_7}}}
Cycle {{{Cycle_8}}}: {{{Reward_8}}}
Cycle {{{Cycle_9}}}: {{{Reward_9}}}
Cycle {{{Cycle_10}}}: {{{Reward_10}}}
Cycle {{{Cycle_11}}}: {{{Reward_11}}}
Cycle {{{Cycle_12}}}: {{{Reward_12}}}
Cycle {{{Cycle_13}}}: {{{Reward_13}}}
Cycle {{{Cycle_14}}}: {{{Reward_14}}}
Cycle {{{Cycle_15}}}: {{{Reward_15}}}
Cycle {{{Cycle_16}}}: {{{Reward_16}}}
Cycle {{{Cycle_17}}}: {{{Reward_17}}}
Cycle {{{Cycle_18}}}: {{{Reward_18}}}
Cycle {{{Cycle_19}}}: {{{Reward_19}}}
Cycle {{{Cycle_20}}}: {{{Reward_20}}}


Explorer Reina - Treasure Hunting 1 - Desert Beach


Explorer Reina
Desert Beach Field 3 - Statue of Anubis
Image:Circle.gif
NPC: Explorer Reina Location: Desert Beach Field 3 - Statue of Anubis
Base Experience: None TM Experience: None
Request: Worn Beach Map A, Worn Beach Map B
Quest Cycles: Infinite Time(s) Condition: Level 15~115, have completed Indiana John - Old Man's Dream, haven't Worn Beach Treasure Map in inventory
Cycle 1: Worn Beach Treasure Map
Cycle {{{Cycle_2}}}: {{{Reward_2}}}
Cycle {{{Cycle_3}}}: {{{Reward_3}}}
Cycle {{{Cycle_4}}}: {{{Reward_4}}}
Cycle {{{Cycle_5}}}: {{{Reward_5}}}
Cycle {{{Cycle_6}}}: {{{Reward_6}}}
Cycle {{{Cycle_7}}}: {{{Reward_7}}}
Cycle {{{Cycle_8}}}: {{{Reward_8}}}
Cycle {{{Cycle_9}}}: {{{Reward_9}}}
Cycle {{{Cycle_10}}}: {{{Reward_10}}}
Cycle {{{Cycle_11}}}: {{{Reward_11}}}
Cycle {{{Cycle_12}}}: {{{Reward_12}}}
Cycle {{{Cycle_13}}}: {{{Reward_13}}}
Cycle {{{Cycle_14}}}: {{{Reward_14}}}
Cycle {{{Cycle_15}}}: {{{Reward_15}}}
Cycle {{{Cycle_16}}}: {{{Reward_16}}}
Cycle {{{Cycle_17}}}: {{{Reward_17}}}
Cycle {{{Cycle_18}}}: {{{Reward_18}}}
Cycle {{{Cycle_19}}}: {{{Reward_19}}}
Cycle {{{Cycle_20}}}: {{{Reward_20}}}


Explorer Reina - Treasure Hunting 2 - Desert Beach


Explorer Reina
Desert Beach Field 3 - Statue of Anubis
Image:Circle.gif
NPC: Explorer Reina Location: Desert Beach Field 3 - Statue of Anubis
Base Experience: 2,656 TM Experience: 2,656
Request: Old Beach Map A, Old Beach Map B
Quest Cycles: 1 Time(s) Condition: Level 15~115, have completed Indiana John - Old Man's Dream, finished Explorer Reina - Treasure Hunting 1 - Desert Beach 50 times, haven't Old Beach Treasure Map in inventory
Cycle 1: Old Beach Treasure Map
Cycle {{{Cycle_2}}}: {{{Reward_2}}}
Cycle {{{Cycle_3}}}: {{{Reward_3}}}
Cycle {{{Cycle_4}}}: {{{Reward_4}}}
Cycle {{{Cycle_5}}}: {{{Reward_5}}}
Cycle {{{Cycle_6}}}: {{{Reward_6}}}
Cycle {{{Cycle_7}}}: {{{Reward_7}}}
Cycle {{{Cycle_8}}}: {{{Reward_8}}}
Cycle {{{Cycle_9}}}: {{{Reward_9}}}
Cycle {{{Cycle_10}}}: {{{Reward_10}}}
Cycle {{{Cycle_11}}}: {{{Reward_11}}}
Cycle {{{Cycle_12}}}: {{{Reward_12}}}
Cycle {{{Cycle_13}}}: {{{Reward_13}}}
Cycle {{{Cycle_14}}}: {{{Reward_14}}}
Cycle {{{Cycle_15}}}: {{{Reward_15}}}
Cycle {{{Cycle_16}}}: {{{Reward_16}}}
Cycle {{{Cycle_17}}}: {{{Reward_17}}}
Cycle {{{Cycle_18}}}: {{{Reward_18}}}
Cycle {{{Cycle_19}}}: {{{Reward_19}}}
Cycle {{{Cycle_20}}}: {{{Reward_20}}}


Skill Quests

Driller Marky - Crazy Drilling!


Driller Marky
Beach Town - Paradise
Image:Circle.gif
NPC: Driller Marky Location: Beach Town - Paradise
Base Experience: 49,389 TM Experience: None
Request: Earth Charm, Drilling Certification
Quest Cycles: 1 Time(s) Condition: Level 25+
Cycle 1: Crazy Drilling Card, 30x Basic Detection Scroll S
Cycle {{{Cycle_2}}}: {{{Reward_2}}}
Cycle {{{Cycle_3}}}: {{{Reward_3}}}
Cycle {{{Cycle_4}}}: {{{Reward_4}}}
Cycle {{{Cycle_5}}}: {{{Reward_5}}}
Cycle {{{Cycle_6}}}: {{{Reward_6}}}
Cycle {{{Cycle_7}}}: {{{Reward_7}}}
Cycle {{{Cycle_8}}}: {{{Reward_8}}}
Cycle {{{Cycle_9}}}: {{{Reward_9}}}
Cycle {{{Cycle_10}}}: {{{Reward_10}}}
Cycle {{{Cycle_11}}}: {{{Reward_11}}}
Cycle {{{Cycle_12}}}: {{{Reward_12}}}
Cycle {{{Cycle_13}}}: {{{Reward_13}}}
Cycle {{{Cycle_14}}}: {{{Reward_14}}}
Cycle {{{Cycle_15}}}: {{{Reward_15}}}
Cycle {{{Cycle_16}}}: {{{Reward_16}}}
Cycle {{{Cycle_17}}}: {{{Reward_17}}}
Cycle {{{Cycle_18}}}: {{{Reward_18}}}
Cycle {{{Cycle_19}}}: {{{Reward_19}}}
Cycle {{{Cycle_20}}}: {{{Reward_20}}}


Indiana John - Acquire Rare Artifacts


Indiana John
Beach Town - Paradise
Image:Circle.gif
NPC: Indiana John Location: Beach Town - Paradise
Base Experience: 49,389 TM Experience: None
Request: Broken Artifact 1, Broken Artifact 2, Broken Artifact 3
Quest Cycles: 1 Time(s) Condition: Have Driller Marky - Crazy Drilling! in quest log
Cycle 1: Earth Charm
Cycle {{{Cycle_2}}}: {{{Reward_2}}}
Cycle {{{Cycle_3}}}: {{{Reward_3}}}
Cycle {{{Cycle_4}}}: {{{Reward_4}}}
Cycle {{{Cycle_5}}}: {{{Reward_5}}}
Cycle {{{Cycle_6}}}: {{{Reward_6}}}
Cycle {{{Cycle_7}}}: {{{Reward_7}}}
Cycle {{{Cycle_8}}}: {{{Reward_8}}}
Cycle {{{Cycle_9}}}: {{{Reward_9}}}
Cycle {{{Cycle_10}}}: {{{Reward_10}}}
Cycle {{{Cycle_11}}}: {{{Reward_11}}}
Cycle {{{Cycle_12}}}: {{{Reward_12}}}
Cycle {{{Cycle_13}}}: {{{Reward_13}}}
Cycle {{{Cycle_14}}}: {{{Reward_14}}}
Cycle {{{Cycle_15}}}: {{{Reward_15}}}
Cycle {{{Cycle_16}}}: {{{Reward_16}}}
Cycle {{{Cycle_17}}}: {{{Reward_17}}}
Cycle {{{Cycle_18}}}: {{{Reward_18}}}
Cycle {{{Cycle_19}}}: {{{Reward_19}}}
Cycle {{{Cycle_20}}}: {{{Reward_20}}}

Notes: Broken Artifact 1 Broken Artifact 1 is dropped by Sand Demon (Lv.28). Broken Artifact 2 Broken Artifact 2 is dropped by Fan Lizard (Lv.26). Broken Artifact 3 Broken Artifact 3 is dropped by Cannon Shell (Lv.33).


Explorer Reina - Driller Master Test


Explorer Reina
Beach Town - Paradise
Image:Circle.gif
NPC: Explorer Reina Location: Beach Town - Paradise
Base Experience: 49,389 TM Experience: None
Request: Driller King Necklace, Driller King Ring, Driller King Bag
Quest Cycles: 1 Time(s) Condition: Level 20+, have Driller Marky - Driller King's Crazy Skill in quest log
Cycle 1: Drilling Certification
Cycle {{{Cycle_2}}}: {{{Reward_2}}}
Cycle {{{Cycle_3}}}: {{{Reward_3}}}
Cycle {{{Cycle_4}}}: {{{Reward_4}}}
Cycle {{{Cycle_5}}}: {{{Reward_5}}}
Cycle {{{Cycle_6}}}: {{{Reward_6}}}
Cycle {{{Cycle_7}}}: {{{Reward_7}}}
Cycle {{{Cycle_8}}}: {{{Reward_8}}}
Cycle {{{Cycle_9}}}: {{{Reward_9}}}
Cycle {{{Cycle_10}}}: {{{Reward_10}}}
Cycle {{{Cycle_11}}}: {{{Reward_11}}}
Cycle {{{Cycle_12}}}: {{{Reward_12}}}
Cycle {{{Cycle_13}}}: {{{Reward_13}}}
Cycle {{{Cycle_14}}}: {{{Reward_14}}}
Cycle {{{Cycle_15}}}: {{{Reward_15}}}
Cycle {{{Cycle_16}}}: {{{Reward_16}}}
Cycle {{{Cycle_17}}}: {{{Reward_17}}}
Cycle {{{Cycle_18}}}: {{{Reward_18}}}
Cycle {{{Cycle_19}}}: {{{Reward_19}}}
Cycle {{{Cycle_20}}}: {{{Reward_20}}}


Explorer Reina - Ancient Liquid


Explorer Reina
Pyramid Dungeon 2 - Hall of Harpy
Image:Circle.gif
NPC: Explorer Reina Location: Pyramid Dungeon 2 - Hall of Harpy
Base Experience: None TM Experience: None
Request: 10x Neurotoxin, 10x Formic Acid
Quest Cycles: 1 Time(s) Condition: Explorer, Thief Master or Cyber Hunter, Pouch of Pain (M)
Cycle 1: Poison Pouch Card
Cycle {{{Cycle_2}}}: {{{Reward_2}}}
Cycle {{{Cycle_3}}}: {{{Reward_3}}}
Cycle {{{Cycle_4}}}: {{{Reward_4}}}
Cycle {{{Cycle_5}}}: {{{Reward_5}}}
Cycle {{{Cycle_6}}}: {{{Reward_6}}}
Cycle {{{Cycle_7}}}: {{{Reward_7}}}
Cycle {{{Cycle_8}}}: {{{Reward_8}}}
Cycle {{{Cycle_9}}}: {{{Reward_9}}}
Cycle {{{Cycle_10}}}: {{{Reward_10}}}
Cycle {{{Cycle_11}}}: {{{Reward_11}}}
Cycle {{{Cycle_12}}}: {{{Reward_12}}}
Cycle {{{Cycle_13}}}: {{{Reward_13}}}
Cycle {{{Cycle_14}}}: {{{Reward_14}}}
Cycle {{{Cycle_15}}}: {{{Reward_15}}}
Cycle {{{Cycle_16}}}: {{{Reward_16}}}
Cycle {{{Cycle_17}}}: {{{Reward_17}}}
Cycle {{{Cycle_18}}}: {{{Reward_18}}}
Cycle {{{Cycle_19}}}: {{{Reward_19}}}
Cycle {{{Cycle_20}}}: {{{Reward_20}}}

Notes: Neurotoxin Neurotoxin is dropped by Aabon (Lv.307). Formic Acid Formic Acid is dropped by Forest Tickler (Lv.44). Although an Explorer and a Cyber Hunter can complete this quest and obtain the skill card, only a Thief Master can learn Poison Pouch.


Explorer Reina - Poisonous Crafts


Explorer Reina
Pyramid Dungeon 3 - Hall of Bastet
Image:Circle.gif
NPC: Explorer Reina Location: Pyramid Dungeon 3 - Hall of Bastet
Base Experience: None TM Experience: None
Request: 5x Formic Acid, 5x Neurotoxin, 2x Brush
Quest Cycles: 1 Time(s) Condition: Thief Master, Shuriken Master (Lv.1), Hide (Lv.5)
Cycle 1: Poison Assault Card
Cycle {{{Cycle_2}}}: {{{Reward_2}}}
Cycle {{{Cycle_3}}}: {{{Reward_3}}}
Cycle {{{Cycle_4}}}: {{{Reward_4}}}
Cycle {{{Cycle_5}}}: {{{Reward_5}}}
Cycle {{{Cycle_6}}}: {{{Reward_6}}}
Cycle {{{Cycle_7}}}: {{{Reward_7}}}
Cycle {{{Cycle_8}}}: {{{Reward_8}}}
Cycle {{{Cycle_9}}}: {{{Reward_9}}}
Cycle {{{Cycle_10}}}: {{{Reward_10}}}
Cycle {{{Cycle_11}}}: {{{Reward_11}}}
Cycle {{{Cycle_12}}}: {{{Reward_12}}}
Cycle {{{Cycle_13}}}: {{{Reward_13}}}
Cycle {{{Cycle_14}}}: {{{Reward_14}}}
Cycle {{{Cycle_15}}}: {{{Reward_15}}}
Cycle {{{Cycle_16}}}: {{{Reward_16}}}
Cycle {{{Cycle_17}}}: {{{Reward_17}}}
Cycle {{{Cycle_18}}}: {{{Reward_18}}}
Cycle {{{Cycle_19}}}: {{{Reward_19}}}
Cycle {{{Cycle_20}}}: {{{Reward_20}}}

Notes: Formic Acid Formic Acid is dropped by Forest Tickler (Lv.44). Neurotoxin Neurotoxin is dropped by Aabon (Lv.307). Brush Brush is drilled in Ghost Blue Seabed Fields.


Job Change Quests

Boxer Jeanne - Find Champion Guardian Stone


Boxer Jeanne
Desert Beach Field 3 - Statue of Anubis
Image:Circle.gif
NPC: Boxer Jeanne Location: Desert Beach Field 3 - Statue of Anubis
Base Experience: 7,497,300 TM Experience: 7,615,625
Request: Red Ruby, Sacred Water
Quest Cycles: 1 Time(s) Condition: Have Vulcanus Phoenix's Messenger - Champion Quest in quest log, have Marble of Triumph in inventory
Cycle 1: Sealed Guardian, Scroll
Cycle {{{Cycle_2}}}: {{{Reward_2}}}
Cycle {{{Cycle_3}}}: {{{Reward_3}}}
Cycle {{{Cycle_4}}}: {{{Reward_4}}}
Cycle {{{Cycle_5}}}: {{{Reward_5}}}
Cycle {{{Cycle_6}}}: {{{Reward_6}}}
Cycle {{{Cycle_7}}}: {{{Reward_7}}}
Cycle {{{Cycle_8}}}: {{{Reward_8}}}
Cycle {{{Cycle_9}}}: {{{Reward_9}}}
Cycle {{{Cycle_10}}}: {{{Reward_10}}}
Cycle {{{Cycle_11}}}: {{{Reward_11}}}
Cycle {{{Cycle_12}}}: {{{Reward_12}}}
Cycle {{{Cycle_13}}}: {{{Reward_13}}}
Cycle {{{Cycle_14}}}: {{{Reward_14}}}
Cycle {{{Cycle_15}}}: {{{Reward_15}}}
Cycle {{{Cycle_16}}}: {{{Reward_16}}}
Cycle {{{Cycle_17}}}: {{{Reward_17}}}
Cycle {{{Cycle_18}}}: {{{Reward_18}}}
Cycle {{{Cycle_19}}}: {{{Reward_19}}}
Cycle {{{Cycle_20}}}: {{{Reward_20}}}

Notes: Red Ruby Red Ruby is dropped by Chele (Lv.117). Sacred Water Sacred Water is drilled in Black Swamp Fields.


Boxer Jeanne - Find Duelist Guardian Stone


Boxer Jeanne
Desert Beach Field 3 - Statue of Anubis
Image:Circle.gif
NPC: Boxer Jeanne Location: Desert Beach Field 3 - Statue of Anubis
Base Experience: 7,497,300 TM Experience: 7,615,625
Request: Special Jade, Sacred Water
Quest Cycles: 1 Time(s) Condition: Have Alsiedo Bird's Messenger - Duelist Quest in quest log, have Marble of Triumph in inventory
Cycle 1: Sealed Guardian, Scroll
Cycle {{{Cycle_2}}}: {{{Reward_2}}}
Cycle {{{Cycle_3}}}: {{{Reward_3}}}
Cycle {{{Cycle_4}}}: {{{Reward_4}}}
Cycle {{{Cycle_5}}}: {{{Reward_5}}}
Cycle {{{Cycle_6}}}: {{{Reward_6}}}
Cycle {{{Cycle_7}}}: {{{Reward_7}}}
Cycle {{{Cycle_8}}}: {{{Reward_8}}}
Cycle {{{Cycle_9}}}: {{{Reward_9}}}
Cycle {{{Cycle_10}}}: {{{Reward_10}}}
Cycle {{{Cycle_11}}}: {{{Reward_11}}}
Cycle {{{Cycle_12}}}: {{{Reward_12}}}
Cycle {{{Cycle_13}}}: {{{Reward_13}}}
Cycle {{{Cycle_14}}}: {{{Reward_14}}}
Cycle {{{Cycle_15}}}: {{{Reward_15}}}
Cycle {{{Cycle_16}}}: {{{Reward_16}}}
Cycle {{{Cycle_17}}}: {{{Reward_17}}}
Cycle {{{Cycle_18}}}: {{{Reward_18}}}
Cycle {{{Cycle_19}}}: {{{Reward_19}}}
Cycle {{{Cycle_20}}}: {{{Reward_20}}}

Notes: Special Jade Special Jade is dropped by Nora Joe (Lv.126). Sacred Water Sacred Water is drilled in Black Swamp Fields.


Boxer Jeanne - Room of Ordeal Key - Find Compass Frame


Boxer Jeanne
Desert Beach Field 3 - Statue of Anubis
Image:Circle.gif
NPC: Boxer Jeanne Location: Desert Beach Field 3 - Statue of Anubis
Base Experience: 1,000 TM Experience: 1,000
Request: Compass Frame
Quest Cycles: 1 Time(s) Condition: Have completed Boxer Jeanne - Find Champion Guardian Stone or Boxer Jeanne - Find Duelist Guardian Stone
Cycle 1: The Key of Trials
Cycle {{{Cycle_2}}}: {{{Reward_2}}}
Cycle {{{Cycle_3}}}: {{{Reward_3}}}
Cycle {{{Cycle_4}}}: {{{Reward_4}}}
Cycle {{{Cycle_5}}}: {{{Reward_5}}}
Cycle {{{Cycle_6}}}: {{{Reward_6}}}
Cycle {{{Cycle_7}}}: {{{Reward_7}}}
Cycle {{{Cycle_8}}}: {{{Reward_8}}}
Cycle {{{Cycle_9}}}: {{{Reward_9}}}
Cycle {{{Cycle_10}}}: {{{Reward_10}}}
Cycle {{{Cycle_11}}}: {{{Reward_11}}}
Cycle {{{Cycle_12}}}: {{{Reward_12}}}
Cycle {{{Cycle_13}}}: {{{Reward_13}}}
Cycle {{{Cycle_14}}}: {{{Reward_14}}}
Cycle {{{Cycle_15}}}: {{{Reward_15}}}
Cycle {{{Cycle_16}}}: {{{Reward_16}}}
Cycle {{{Cycle_17}}}: {{{Reward_17}}}
Cycle {{{Cycle_18}}}: {{{Reward_18}}}
Cycle {{{Cycle_19}}}: {{{Reward_19}}}
Cycle {{{Cycle_20}}}: {{{Reward_20}}}

Notes: Compass Frame Compass Frame is obtained by completing Make Happisto's Compass Frame.


Boxer Jeanne - Find 16 Guardian Stone for the Needleless Compass


Boxer Jeanne
Desert Beach Field 3 - Statue of Anubis
Image:Circle.gif
NPC: Boxer Jeanne Location: Desert Beach Field 3 - Statue of Anubis
Base Experience: 1,000 TM Experience: 1,000
Request: Marble of Triumph, Stone of Patience
Quest Cycles: 1 Time(s) Condition: Have completed Happisto Stallone - Make Happisto's Compass Frame, have The Key of Trials
Cycle 1: Needleless Compass
Cycle {{{Cycle_2}}}: {{{Reward_2}}}
Cycle {{{Cycle_3}}}: {{{Reward_3}}}
Cycle {{{Cycle_4}}}: {{{Reward_4}}}
Cycle {{{Cycle_5}}}: {{{Reward_5}}}
Cycle {{{Cycle_6}}}: {{{Reward_6}}}
Cycle {{{Cycle_7}}}: {{{Reward_7}}}
Cycle {{{Cycle_8}}}: {{{Reward_8}}}
Cycle {{{Cycle_9}}}: {{{Reward_9}}}
Cycle {{{Cycle_10}}}: {{{Reward_10}}}
Cycle {{{Cycle_11}}}: {{{Reward_11}}}
Cycle {{{Cycle_12}}}: {{{Reward_12}}}
Cycle {{{Cycle_13}}}: {{{Reward_13}}}
Cycle {{{Cycle_14}}}: {{{Reward_14}}}
Cycle {{{Cycle_15}}}: {{{Reward_15}}}
Cycle {{{Cycle_16}}}: {{{Reward_16}}}
Cycle {{{Cycle_17}}}: {{{Reward_17}}}
Cycle {{{Cycle_18}}}: {{{Reward_18}}}
Cycle {{{Cycle_19}}}: {{{Reward_19}}}
Cycle {{{Cycle_20}}}: {{{Reward_20}}}


Magician Louie - Find Priest Guardian Stone


Magician Louie
Pyramid Dungeon 1 - Hall of the Slave
Image:Circle.gif
NPC: Magician Louie Location: Pyramid Dungeon 1 - Hall of the Slave
Base Experience: 7,497,300 TM Experience: 7,615,625
Request: Shiny Diamond, Sacred Water
Quest Cycles: 1 Time(s) Condition: Have Eternal Knight's Messenger - Priest Quest in quest log, have Marble of Triumph in inventory
Cycle 1: Sealed Guardian, Scroll
Cycle {{{Cycle_2}}}: {{{Reward_2}}}
Cycle {{{Cycle_3}}}: {{{Reward_3}}}
Cycle {{{Cycle_4}}}: {{{Reward_4}}}
Cycle {{{Cycle_5}}}: {{{Reward_5}}}
Cycle {{{Cycle_6}}}: {{{Reward_6}}}
Cycle {{{Cycle_7}}}: {{{Reward_7}}}
Cycle {{{Cycle_8}}}: {{{Reward_8}}}
Cycle {{{Cycle_9}}}: {{{Reward_9}}}
Cycle {{{Cycle_10}}}: {{{Reward_10}}}
Cycle {{{Cycle_11}}}: {{{Reward_11}}}
Cycle {{{Cycle_12}}}: {{{Reward_12}}}
Cycle {{{Cycle_13}}}: {{{Reward_13}}}
Cycle {{{Cycle_14}}}: {{{Reward_14}}}
Cycle {{{Cycle_15}}}: {{{Reward_15}}}
Cycle {{{Cycle_16}}}: {{{Reward_16}}}
Cycle {{{Cycle_17}}}: {{{Reward_17}}}
Cycle {{{Cycle_18}}}: {{{Reward_18}}}
Cycle {{{Cycle_19}}}: {{{Reward_19}}}
Cycle {{{Cycle_20}}}: {{{Reward_20}}}

Notes: Shiny Diamond Shiny Diamond is dropped by Captain Arman (Lv.145). Sacred Water Sacred Water is drilled in Black Swamp Fields.


Magician Louie - Find Wizard Guardian Stone


Magician Louie
Pyramid Dungeon 1 - Hall of the Slave
Image:Circle.gif
NPC: Magician Louie Location: Pyramid Dungeon 1 - Hall of the Slave
Base Experience: 7,497,300 TM Experience: 7,615,625
Request: Green Emerald, Sacred Water
Quest Cycles: 1 Time(s) Condition: Have Silvanian's Messenger - Wizard Quest in quest log, have Marble of Triumph in inventory
Cycle 1: Sealed Guardian, Scroll
Cycle {{{Cycle_2}}}: {{{Reward_2}}}
Cycle {{{Cycle_3}}}: {{{Reward_3}}}
Cycle {{{Cycle_4}}}: {{{Reward_4}}}
Cycle {{{Cycle_5}}}: {{{Reward_5}}}
Cycle {{{Cycle_6}}}: {{{Reward_6}}}
Cycle {{{Cycle_7}}}: {{{Reward_7}}}
Cycle {{{Cycle_8}}}: {{{Reward_8}}}
Cycle {{{Cycle_9}}}: {{{Reward_9}}}
Cycle {{{Cycle_10}}}: {{{Reward_10}}}
Cycle {{{Cycle_11}}}: {{{Reward_11}}}
Cycle {{{Cycle_12}}}: {{{Reward_12}}}
Cycle {{{Cycle_13}}}: {{{Reward_13}}}
Cycle {{{Cycle_14}}}: {{{Reward_14}}}
Cycle {{{Cycle_15}}}: {{{Reward_15}}}
Cycle {{{Cycle_16}}}: {{{Reward_16}}}
Cycle {{{Cycle_17}}}: {{{Reward_17}}}
Cycle {{{Cycle_18}}}: {{{Reward_18}}}
Cycle {{{Cycle_19}}}: {{{Reward_19}}}
Cycle {{{Cycle_20}}}: {{{Reward_20}}}

Notes: Green Emerald Green Emerald is dropped by Merrow (Lv.118). Sacred Water Sacred Water is drilled in Black Swamp Fields.


Magician Louie - Room of Ordeal Key - Find Compass Frame


Magician Louie
Pyramid Dungeon 1 - Hall of the Slave
Image:Circle.gif
NPC: Magician Louie Location: Pyramid Dungeon 1 - Hall of the Slave
Base Experience: 1,000 TM Experience: 1,000
Request: Compass Frame
Quest Cycles: 1 Time(s) Condition: Have completed Magician Louie - Find Priest Guardian Stone or Magician Louie - Find Wizard Guardian Stone
Cycle 1: The Key of Trials
Cycle {{{Cycle_2}}}: {{{Reward_2}}}
Cycle {{{Cycle_3}}}: {{{Reward_3}}}
Cycle {{{Cycle_4}}}: {{{Reward_4}}}
Cycle {{{Cycle_5}}}: {{{Reward_5}}}
Cycle {{{Cycle_6}}}: {{{Reward_6}}}
Cycle {{{Cycle_7}}}: {{{Reward_7}}}
Cycle {{{Cycle_8}}}: {{{Reward_8}}}
Cycle {{{Cycle_9}}}: {{{Reward_9}}}
Cycle {{{Cycle_10}}}: {{{Reward_10}}}
Cycle {{{Cycle_11}}}: {{{Reward_11}}}
Cycle {{{Cycle_12}}}: {{{Reward_12}}}
Cycle {{{Cycle_13}}}: {{{Reward_13}}}
Cycle {{{Cycle_14}}}: {{{Reward_14}}}
Cycle {{{Cycle_15}}}: {{{Reward_15}}}
Cycle {{{Cycle_16}}}: {{{Reward_16}}}
Cycle {{{Cycle_17}}}: {{{Reward_17}}}
Cycle {{{Cycle_18}}}: {{{Reward_18}}}
Cycle {{{Cycle_19}}}: {{{Reward_19}}}
Cycle {{{Cycle_20}}}: {{{Reward_20}}}

Notes: Compass Frame Compass Frame is obtained by completing Make Happisto's Compass Frame.


Magician Louie - Find 16 Guardian Stones for the Needleless Compass


Magician Louie
Pyramid Dungeon 1 - Hall of the Slave
Image:Circle.gif
NPC: Magician Louie Location: Pyramid Dungeon 1 - Hall of the Slave
Base Experience: 1,000 TM Experience: 1,000
Request: Marble of Triumph, Stone of Patience
Quest Cycles: 1 Time(s) Condition: Have completed Happisto Stallone - Make Happisto's Compass Frame, have The Key of Trials
Cycle 1: Needleless Compass
Cycle {{{Cycle_2}}}: {{{Reward_2}}}
Cycle {{{Cycle_3}}}: {{{Reward_3}}}
Cycle {{{Cycle_4}}}: {{{Reward_4}}}
Cycle {{{Cycle_5}}}: {{{Reward_5}}}
Cycle {{{Cycle_6}}}: {{{Reward_6}}}
Cycle {{{Cycle_7}}}: {{{Reward_7}}}
Cycle {{{Cycle_8}}}: {{{Reward_8}}}
Cycle {{{Cycle_9}}}: {{{Reward_9}}}
Cycle {{{Cycle_10}}}: {{{Reward_10}}}
Cycle {{{Cycle_11}}}: {{{Reward_11}}}
Cycle {{{Cycle_12}}}: {{{Reward_12}}}
Cycle {{{Cycle_13}}}: {{{Reward_13}}}
Cycle {{{Cycle_14}}}: {{{Reward_14}}}
Cycle {{{Cycle_15}}}: {{{Reward_15}}}
Cycle {{{Cycle_16}}}: {{{Reward_16}}}
Cycle {{{Cycle_17}}}: {{{Reward_17}}}
Cycle {{{Cycle_18}}}: {{{Reward_18}}}
Cycle {{{Cycle_19}}}: {{{Reward_19}}}
Cycle {{{Cycle_20}}}: {{{Reward_20}}}


Tutankhamen Trial Quests

Bastet - Transfer to the Test of Calmness


Bastet
Pyramid Dungeon 6 - Hall of the Queen
Image:Circle.gif
NPC: Bastet Location: Pyramid Dungeon 6 - Hall of the Queen
Request: Subject's Mask, Subject's Earrings (not consumed)
Condition: Level 1~90, 20 min after you have defeated Tutankhamen
Transfer to: Room of Guardian - Test of Calmness

Notes: Subject's Mask Subject's Mask and Subject's Earrings Subject's Earrings are dropped by Seth (Lv.45).


Lieutenant - Test of Calmness


Lieutenant
Room of Guardian - Test of Calmness
Image:Circle.gif
NPC: Lieutenant Location: Room of Guardian - Test of Calmness
Quest Cycles: Each 1 Time(s) Condition: Level 1~90
Level Request Reward Base / TM
1~90 1x Scarab (2) (Lv.1) in 5 min Teleport to Room of Guardian - Test of Quickness 3,000 / 1,000
{{{Level_2}}} {{{Qt_2}}}x [[{{{Monster_2}}}]] (Lv.{{{LvM_2}}}) in {{{Time_2}}} {{{Reward_2}}} {{{Exp_2}}}
{{{Level_3}}} {{{Qt_3}}}x [[{{{Monster_3}}}]] (Lv.{{{LvM_3}}}) in {{{Time_3}}} {{{Reward_3}}} {{{Exp_3}}}
{{{Level_4}}} {{{Qt_4}}}x [[{{{Monster_4}}}]] (Lv.{{{LvM_4}}}) in {{{Time_4}}} {{{Reward_4}}} {{{Exp_4}}}
{{{Level_5}}} {{{Qt_5}}}x [[{{{Monster_5}}}]] (Lv.{{{LvM_5}}}) in {{{Time_5}}} {{{Reward_5}}} {{{Exp_5}}}
Found at:
Scarab (2) is found at Room of Guardian - Test of Calmness (ground area).
Scarab (2)

Notes: It's the only Scarab that is hostile. It's usually all the way to the right. You don't have to pick up the King's Seal.


Sergeant - Test of Quickness


Sergeant
Room of Guardian - Test of Quickness
Image:Circle.gif
NPC: Sergeant Location: Room of Guardian - Test of Quickness
Quest Cycles: Each 1 Time(s) Condition: Level 1~90
Level Request Reward Base / TM
1~90 1x Pharaoh's Mimic (Lv.44) in 2 min 10 Galder Coupon, teleport to Room of Guardian - Test of Knowledge 3,000 / 1,000
{{{Level_2}}} {{{Qt_2}}}x [[{{{Monster_2}}}]] (Lv.{{{LvM_2}}}) in {{{Time_2}}} {{{Reward_2}}} {{{Exp_2}}}
{{{Level_3}}} {{{Qt_3}}}x [[{{{Monster_3}}}]] (Lv.{{{LvM_3}}}) in {{{Time_3}}} {{{Reward_3}}} {{{Exp_3}}}
{{{Level_4}}} {{{Qt_4}}}x [[{{{Monster_4}}}]] (Lv.{{{LvM_4}}}) in {{{Time_4}}} {{{Reward_4}}} {{{Exp_4}}}
{{{Level_5}}} {{{Qt_5}}}x [[{{{Monster_5}}}]] (Lv.{{{LvM_5}}}) in {{{Time_5}}} {{{Reward_5}}} {{{Exp_5}}}
Found at:
Pharaoh's Mimic is found at Room of Guardian - Test of Quickness (small room).
Pharaoh's Mimic

Notes: You don't have to make it back in time after you have defeated Pharaoh's Mimic.


Captain - Test of Knowledge


Captain
Room of Guardian - Test of Knowledge
Image:Circle.gif
NPC: Captain Location: Room of Guardian - Test of Knowledge
Base Experience: None TM Experience: None
Request: Answer the questions correctly.
Quest Cycles: 1 Time(s) Condition: Level 1~90
Cycle 1: Teleport to Room of Guardian - Test of Power
Cycle {{{Cycle_2}}}: {{{Reward_2}}}
Cycle {{{Cycle_3}}}: {{{Reward_3}}}
Cycle {{{Cycle_4}}}: {{{Reward_4}}}
Cycle {{{Cycle_5}}}: {{{Reward_5}}}
Cycle {{{Cycle_6}}}: {{{Reward_6}}}
Cycle {{{Cycle_7}}}: {{{Reward_7}}}
Cycle {{{Cycle_8}}}: {{{Reward_8}}}
Cycle {{{Cycle_9}}}: {{{Reward_9}}}
Cycle {{{Cycle_10}}}: {{{Reward_10}}}
Cycle {{{Cycle_11}}}: {{{Reward_11}}}
Cycle {{{Cycle_12}}}: {{{Reward_12}}}
Cycle {{{Cycle_13}}}: {{{Reward_13}}}
Cycle {{{Cycle_14}}}: {{{Reward_14}}}
Cycle {{{Cycle_15}}}: {{{Reward_15}}}
Cycle {{{Cycle_16}}}: {{{Reward_16}}}
Cycle {{{Cycle_17}}}: {{{Reward_17}}}
Cycle {{{Cycle_18}}}: {{{Reward_18}}}
Cycle {{{Cycle_19}}}: {{{Reward_19}}}
Cycle {{{Cycle_20}}}: {{{Reward_20}}}

Notes: For the answers see Test of Knowledge Guide.


Bastet - Test of Power


Bastet
Room of Guardian - Test of Power
Image:Circle.gif
NPC: Bastet Location: Room of Guardian - Test of Power
Base Experience: None TM Experience: None
Request: Gray Round Seal, Dark Round Seal, Red Round Seal
Quest Cycles: 1 Time(s) Condition: Level 1~90
Cycle 1: Teleport to Pyramid Dungeon 7 - Doom of Pharaoh
Cycle {{{Cycle_2}}}: {{{Reward_2}}}
Cycle {{{Cycle_3}}}: {{{Reward_3}}}
Cycle {{{Cycle_4}}}: {{{Reward_4}}}
Cycle {{{Cycle_5}}}: {{{Reward_5}}}
Cycle {{{Cycle_6}}}: {{{Reward_6}}}
Cycle {{{Cycle_7}}}: {{{Reward_7}}}
Cycle {{{Cycle_8}}}: {{{Reward_8}}}
Cycle {{{Cycle_9}}}: {{{Reward_9}}}
Cycle {{{Cycle_10}}}: {{{Reward_10}}}
Cycle {{{Cycle_11}}}: {{{Reward_11}}}
Cycle {{{Cycle_12}}}: {{{Reward_12}}}
Cycle {{{Cycle_13}}}: {{{Reward_13}}}
Cycle {{{Cycle_14}}}: {{{Reward_14}}}
Cycle {{{Cycle_15}}}: {{{Reward_15}}}
Cycle {{{Cycle_16}}}: {{{Reward_16}}}
Cycle {{{Cycle_17}}}: {{{Reward_17}}}
Cycle {{{Cycle_18}}}: {{{Reward_18}}}
Cycle {{{Cycle_19}}}: {{{Reward_19}}}
Cycle {{{Cycle_20}}}: {{{Reward_20}}}

Notes: Gray Round Seal Gray Round Seal is dropped by Guardian (Lv.55). Dark Round Seal Dark Round Seal is dropped by Captain (1) (Lv.55). Red Round Seal Red Round Seal is dropped by Captain (2) (Lv.55).


Ankh Pendant Quests

Pharaoh Boy - Young Pharaoh's Awakening


Pharaoh Boy
Desert Beach Field 3 - Statue of Anubis
Image:Circle.gif
NPC: Pharaoh Boy Location: Desert Beach Field 3 - Statue of Anubis
Base Experience: 789,516 TM Experience: 331,328
Request: Piece of Free Soul 1, Piece of Free Soul 2, Piece of Free Soul 3
Quest Cycles: 1 Time(s) Condition: Level 35~90, have Pharaoh Hat, Golden Sword, Golden Lion Shield in inventory
Cycle 1: Pharaoh Boy Card, Ankh Pendant
Cycle {{{Cycle_2}}}: {{{Reward_2}}}
Cycle {{{Cycle_3}}}: {{{Reward_3}}}
Cycle {{{Cycle_4}}}: {{{Reward_4}}}
Cycle {{{Cycle_5}}}: {{{Reward_5}}}
Cycle {{{Cycle_6}}}: {{{Reward_6}}}
Cycle {{{Cycle_7}}}: {{{Reward_7}}}
Cycle {{{Cycle_8}}}: {{{Reward_8}}}
Cycle {{{Cycle_9}}}: {{{Reward_9}}}
Cycle {{{Cycle_10}}}: {{{Reward_10}}}
Cycle {{{Cycle_11}}}: {{{Reward_11}}}
Cycle {{{Cycle_12}}}: {{{Reward_12}}}
Cycle {{{Cycle_13}}}: {{{Reward_13}}}
Cycle {{{Cycle_14}}}: {{{Reward_14}}}
Cycle {{{Cycle_15}}}: {{{Reward_15}}}
Cycle {{{Cycle_16}}}: {{{Reward_16}}}
Cycle {{{Cycle_17}}}: {{{Reward_17}}}
Cycle {{{Cycle_18}}}: {{{Reward_18}}}
Cycle {{{Cycle_19}}}: {{{Reward_19}}}
Cycle {{{Cycle_20}}}: {{{Reward_20}}}


Anubis - Anubis' Mission (1)


Anubis
Pyramid Dungeon 2 - Hall of Harpy
Image:Circle.gif
NPC: Anubis Location: Pyramid Dungeon 2 - Hall of Harpy
Quest Cycles: Each 1 Time(s) Condition: Level 35~90, have Golden Sword
Level Request Reward Base / TM
35~90 30x Soul Taker (1) (Lv.60) in 10 min Anubis Card 464,590 / 194,970
{{{Level_2}}} {{{Qt_2}}}x [[{{{Monster_2}}}]] (Lv.{{{LvM_2}}}) in {{{Time_2}}} {{{Reward_2}}} {{{Exp_2}}}
{{{Level_3}}} {{{Qt_3}}}x [[{{{Monster_3}}}]] (Lv.{{{LvM_3}}}) in {{{Time_3}}} {{{Reward_3}}} {{{Exp_3}}}
{{{Level_4}}} {{{Qt_4}}}x [[{{{Monster_4}}}]] (Lv.{{{LvM_4}}}) in {{{Time_4}}} {{{Reward_4}}} {{{Exp_4}}}
{{{Level_5}}} {{{Qt_5}}}x [[{{{Monster_5}}}]] (Lv.{{{LvM_5}}}) in {{{Time_5}}} {{{Reward_5}}} {{{Exp_5}}}
Found at:
Soul Taker (1) is found at Pyramid Dungeon - Room of Truth.
Soul Taker (1)

Notes: Golden Sword Golden Sword is dropped by Tutankhamen (Lv.71). After completing this quest Anubis offers teleport to Pyramid Dungeon - Room of Truth.


Anubis - Anubis' Mission (2)


Anubis
Pyramid Dungeon - Room of Truth
Image:Circle.gif
NPC: Anubis Location: Pyramid Dungeon - Room of Truth
Quest Cycles: Each 1 Time(s) Condition: Level 35~90, have Golden Sword, have completed Anubis - Anubis' Mission (1)
Level Request Reward Base / TM
35~90 20x Soul Taker (2) (Lv.60) in 10 min Piece of Free Soul 1 444,391 / 186,493
{{{Level_2}}} {{{Qt_2}}}x [[{{{Monster_2}}}]] (Lv.{{{LvM_2}}}) in {{{Time_2}}} {{{Reward_2}}} {{{Exp_2}}}
{{{Level_3}}} {{{Qt_3}}}x [[{{{Monster_3}}}]] (Lv.{{{LvM_3}}}) in {{{Time_3}}} {{{Reward_3}}} {{{Exp_3}}}
{{{Level_4}}} {{{Qt_4}}}x [[{{{Monster_4}}}]] (Lv.{{{LvM_4}}}) in {{{Time_4}}} {{{Reward_4}}} {{{Exp_4}}}
{{{Level_5}}} {{{Qt_5}}}x [[{{{Monster_5}}}]] (Lv.{{{LvM_5}}}) in {{{Time_5}}} {{{Reward_5}}} {{{Exp_5}}}
Found at:
Soul Taker (2) is found at Pyramid Dungeon - Room of Truth.
Soul Taker (2)

Notes: Golden Sword Golden Sword is dropped by Tutankhamen (Lv.71). Don't kill any monsters before you start the quest.


Nefertiti 1 - Nefertiti's Mission


Nefertiti 1
Pyramid Dungeon 6 - Hall of the Queen
Image:Circle.gif
NPC: Nefertiti 1 Location: Pyramid Dungeon 6 - Hall of the Queen
Base Experience: 631,612 TM Experience: 265,062
Request: 15x Book of the Dead
Quest Cycles: 1 Time(s) Condition: Level 35~90, have Pharaoh Hat
Cycle 1: Nefertiti Card, Piece of Free Soul 2
Cycle {{{Cycle_2}}}: {{{Reward_2}}}
Cycle {{{Cycle_3}}}: {{{Reward_3}}}
Cycle {{{Cycle_4}}}: {{{Reward_4}}}
Cycle {{{Cycle_5}}}: {{{Reward_5}}}
Cycle {{{Cycle_6}}}: {{{Reward_6}}}
Cycle {{{Cycle_7}}}: {{{Reward_7}}}
Cycle {{{Cycle_8}}}: {{{Reward_8}}}
Cycle {{{Cycle_9}}}: {{{Reward_9}}}
Cycle {{{Cycle_10}}}: {{{Reward_10}}}
Cycle {{{Cycle_11}}}: {{{Reward_11}}}
Cycle {{{Cycle_12}}}: {{{Reward_12}}}
Cycle {{{Cycle_13}}}: {{{Reward_13}}}
Cycle {{{Cycle_14}}}: {{{Reward_14}}}
Cycle {{{Cycle_15}}}: {{{Reward_15}}}
Cycle {{{Cycle_16}}}: {{{Reward_16}}}
Cycle {{{Cycle_17}}}: {{{Reward_17}}}
Cycle {{{Cycle_18}}}: {{{Reward_18}}}
Cycle {{{Cycle_19}}}: {{{Reward_19}}}
Cycle {{{Cycle_20}}}: {{{Reward_20}}}

Notes: Pharaoh Hat Pharaoh Hat is dropped by Tutankhamen (Lv.71). Book of the Dead Book of the Dead is drilled in Pyramid Dungeon Halls.


Bastet - Bastet's Mission


Bastet
Pyramid Dungeon 3 - Hall of Bastet
Image:Circle.gif
NPC: Bastet Location: Pyramid Dungeon 3 - Hall of Bastet
Base Experience: 421,075 TM Experience: 176,708
Request: Blue Feather, Nephthys Song, Red Feather, Isis' Song
Quest Cycles: 1 Time(s) Condition: Level 35~90, have Golden Lion Shield
Cycle 1: Bastet Card, Piece of Free Soul 3
Cycle {{{Cycle_2}}}: {{{Reward_2}}}
Cycle {{{Cycle_3}}}: {{{Reward_3}}}
Cycle {{{Cycle_4}}}: {{{Reward_4}}}
Cycle {{{Cycle_5}}}: {{{Reward_5}}}
Cycle {{{Cycle_6}}}: {{{Reward_6}}}
Cycle {{{Cycle_7}}}: {{{Reward_7}}}
Cycle {{{Cycle_8}}}: {{{Reward_8}}}
Cycle {{{Cycle_9}}}: {{{Reward_9}}}
Cycle {{{Cycle_10}}}: {{{Reward_10}}}
Cycle {{{Cycle_11}}}: {{{Reward_11}}}
Cycle {{{Cycle_12}}}: {{{Reward_12}}}
Cycle {{{Cycle_13}}}: {{{Reward_13}}}
Cycle {{{Cycle_14}}}: {{{Reward_14}}}
Cycle {{{Cycle_15}}}: {{{Reward_15}}}
Cycle {{{Cycle_16}}}: {{{Reward_16}}}
Cycle {{{Cycle_17}}}: {{{Reward_17}}}
Cycle {{{Cycle_18}}}: {{{Reward_18}}}
Cycle {{{Cycle_19}}}: {{{Reward_19}}}
Cycle {{{Cycle_20}}}: {{{Reward_20}}}

Notes: Golden Lion Shield Golden Lion Shield is dropped by Tutankhamen (Lv.71). Blue Feather Blue Feather and Nephthys Song Nephthys Song are dropped by Nephthys (Lv.38). Red Feather Red Feather and Isis' Song Isis' Song are dropped by Isis (Lv.42).

Pages in category "Desert Beach Quest"

There are 88 pages in this category.

A

B

C

D

D cont.

E

H

I

K

L

M

N

O

P

R

S

V

Personal tools


ggFTW Games