Quests Level 180-199
From ggFTW Trickster Wiki
Level 180+
[edit]
 | NPC: Card Girl | Location: Gate of Black Swamp | |
| Base Experience: None | TM Experience: 4,678,418 | ||
| Request: Unknown Item | |||
| Quest Cycles: 1 Time(s) | Condition: Level 180+ | ||
| Cycle 1: 5x Arcana Dream Card | |||
|
Notes: "Unknown Item" is | |||
[edit]

| 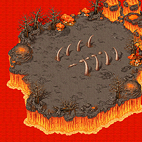 | NPC: Janus' Messenger | Location: Janus's Secret Hideaway - Memory of Flames |
| Base Experience: 3,774,425 | TM Experience: 834,022 | ||
| Request: 10x Living Flame | |||
| Quest Cycles: 1 Time(s) | Condition: Lv.180+, 3rd Job, Poseidon Seed matured | ||
| Cycle 1: 10x Great H Potion, 10x Great M Potion | |||
|
Notes: Janus's Secret Hideaway - Memory of Flames is accessed with Secret Space Map (see Surprise Spot). Secret Space Map is obtained by collect all 16 Secret Cards. Living Flame is dropped by Red Flame Spirit (Lv.180) that habits Janus's Secret Hideaway - Memory of Flames. | |||
[edit]
|
| | NPC: Janus' Messenger | Location: Janus's Secret Hideaway - Memory of Flames | ||
| Quest Cycles: Each 1 Time(s) | Condition: Lv.180+, 3rd Job, Poseidon Seed matured | ||||
| Level | Request | Reward | Exp / TM | ||
| 180+ | 1x Red Flame Monster (Lv.210) in 3 min | 10x Spicy Egg, 10x Fried Egg, 3x Flower of Revival | 4,599,114 / 1,016,251 | ||
| Found at: | |||||
| Red Flame Monster is found at Janus's Secret Hideaway - Memory of Flames. | |||||
[edit]
|
| | NPC: Janus' Messenger | Location: Janus's Secret Hideaway - Memory of Flames |
| Base Experience: 3,774,425 | TM Experience: 834,022 | ||
| Request: Harkon, Phantom Dust, Secret Space Map | |||
| Quest Cycles: 1 Time(s) | Condition: Lv.180+, 3rd Job, Poseidon Seed matured | ||
| Cycle 1: Guardian Guide, Eclipse's Message, Summon Guardian | |||
|
Notes: Harkon is obtained by complete Blacksmith Marx - Find Ingredients for Precious Jewel and Blacksmith Marx - Silent Lava Mine Collection or can be drilled at Tapasco Volcano Fields. Phantom Dust is obtained by complete Don Danihen - Abraxas. Secret Space Map is obtained by collect all 16 Secret Cards. | |||
[edit]

| NPC: Eclipse | Location: Eclipse's Dimension | |
| Base Experience: 3,774,425 | TM Experience: 834,022 | ||
| Request: Unknown Item | |||
| Quest Cycles: 1 Time(s) | Condition: Lv.180+, 3rd Job, Poseidon Seed matured | ||
| Cycle 1: Dimensional Key | |||
|
Notes: After start Janus' Messenger - Guardian of the Spirit, Janus' Messenger offer teleport to Eclipse's Dimension. Unknown Item is Honey Tea, obtained by compound 1x Honey + 2x Royal Jelly + 2x Distilled Water with Compounder Paul at Megalopolis Square or Relics Town - Azteca. | |||
[edit]
 | NPC: Don Danihen | Location: Young Rosaline's Room | |||
| Quest Cycles: Each 1 Time(s) | Condition: Lv.180+, 3rd Job, Poseidon Seed matured | ||||
| Level | Request | Reward | Exp / TM | ||
| 180+ | 1x Doppleganger (Lv.X) in 2 min | Gift from Danihen, Don Danihen Card, Phantom Dust | 4,624,384 / 1,021,835 | ||
| Found at: | |||||
| Doppleganger is found at Abraxas - Young Rosaline's Room. | |||||
|
Notes: Abraxas - Young Rosaline's Room is accessed by talk to Abraxas Mirror. Doppleganger is a doppleganger of you (same level and stats). He/she can summon others Dopplegangers. | |||||
[edit]
| NPC: Little Rosaline | Location: Young Rosaline's Room | |
| Base Experience: 3,774,425 | TM Experience: 834,022 | ||
| Request: Talk to her | |||
| Quest Cycles: 1 Time(s) | Condition: Lv.180+, 3rd Job, Poseidon Seed matured, have completed Don Danihen - Abraxas | ||
| Cycle 1: 3x Candied Apple, 20x 500 Galder Coupon | |||
[edit]
|
| 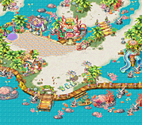 | NPC: Eclipse | Location: Coral Town - Blooming Cora |
| Base Experience: 5,607,717 | TM Experience: 4,336,917 | ||
| Request: 3x Space Chain | |||
| Quest Cycles: 1 Time(s) | Condition: Level 180+, use Mind's Eye, have completed Shadow Star 1 at least once | ||
| Cycle 1: 10,000 Galder Coupon | |||
[edit]
| NPC: Stella | Location: Coral Town - Blooming Cora | |
| Base Experience: 1,842,847 | TM Experience: None | ||
| Request: 5x Giant Nail | |||
| Quest Cycles: 1 Time(s) | Condition: Level 180+, use Mind's Eye | ||
| Cycle 1: Star Card Pack No.5, 5x Half Pink Potion, 5x Half Blue Potion or Story of the Star Gazer Girl 1 | |||
|
Notes: | |||
[edit]
| NPC: Shaman Girl Jia | Location: Coral Town - Blooming Cora | |||
| Quest Cycles: Each 1 Time(s) | Condition: Level 180+, use Mind's Eye | ||||
| Level | Request | Reward | Base / TM | ||
| 180~183 | 3x Shadow Torobbie (Lv.324) in 15 min | 3x Half Pink Potion, 3x Half Blue Potion | 780,453 / 172,454 | ||
| 184~187 | 3x Shadow Bad Fury (Lv.327) in 10 min | 3x Half Pink Potion, 3x Half Blue Potion | 821,437 / 172,848 | ||
| 188~191 | 3x Shadow Little Cora (Lv.333) in 11 min | 3x Half Pink Potion, 3x Half Blue Potion | 866,748 / 173,876 | ||
| 192~195 | 3x Shadow Bustshell (Lv.339) in 11 min | 3x Half Pink Potion, 3x Half Blue Potion | 913,564 / 175,437 | ||
| 196+ | 3x Shadow Addax (Lv.349) in 10 min | 3x Half Pink Potion, 3x Half Blue Potion | 966,459 / 180,635 | ||
| Found at: | |||||
| Shadow Torobbie is found at Coral Beach Field 1 - Blue Wave. Shadow Bad Fury is found at Coral Beach Field 2 - Passionate Sun. Shadow Little Cora is found at Coral Beach Field 2 - Passionate Sun. Shadow Bustshell is found at Coral Beach Field 2 - Passionate Sun. Shadow Addax is found at Coral Beach - Dark Cave. | |||||
[edit]
 | NPC: Hunter Master Leviathan | Location: Laplanoel Monster Guild | |||
| Quest Cycles: Each 5 Time(s) | Condition: Level 180+, have completed at least 1 Hunter Yuna Quest and Assistant Hunter Poppuri's Quest | ||||
| Level | Request | Reward | Base / TM | ||
| 180+ | 30x Great Coolem (Lv.280) in 10 minutes | Hat Exchange H | 4,176,389 / 922,843 | ||
| Found at: | |||||
| Great Coolem is found at Ice Dungeon 3 / 4. | 
| ||||
[edit]
| NPC: Love Hunter Robin | Location: Gate of Blue Ice Dungeon | ||||
| Quest Cycles: Each 5 Time(s) | Condition: Level 180+ | ||||
| Level | Request | Reward | TM | ||
| 180~183 | 20x Niwerth (Lv.252) in 10 min | 10x 500 Galder Coupon, 2x 10,000 Galder Coupon | 1,418,387 | ||
| 184~187 | 20x Freyr (Lv.259) in 10 min | 10x 500 Galder Coupon, 2x 10,000 Galder Coupon | 1,429,661 | ||
| 188~191 | 20x Freyja (Lv.264) in 10 min | 10x 500 Galder Coupon, 2x 10,000 Galder Coupon | 1,437,207 | ||
| 192~195 | 20x Coolem (Lv.272) in 15 min | 10x 500 Galder Coupon, 2x 10,000 Galder Coupon | 1,454,811 | ||
| 196+ | 20x Giant Coolem (Lv.277) in 10 min | 10x 500 Galder Coupon, 2x 10,000 Galder Coupon | 1,495,614 | ||
| Found at: | |||||
| Niwerth is found at Ice Dungeon 1 - Cave of Dark Blue. Freyr is found at Ice Dungeon 1 / 2. Freyja is found at Ice Dungeon 1 / 2 / 3. Coolem is found at Ice Dungeon 2 / 3 / 4. Giant Coolem is found at Ice Dungeon 4 - Teardrop Walkways. | |||||
[edit]
| NPC: Love Hunter Robin | Location: Path to Phantom School Annex | ||||
| Quest Cycles: Each 5 Time(s) | Condition: Level 80+ | ||||
| Level | Request | Reward | TM | ||
| 80~140 | 15x Leader Toy (Lv.154) in 30 min | 3x 500 Galder Coupon | 1,185,000 | ||
| 141~160 | 15x Arccomon (Lv.163) in 30 min | 4x 500 Galder Coupon | 1,333,000 | ||
| 161~180 | 15x Pale (Lv.173) in 30 min | 5x 500 Galder Coupon | 1,520,000 | ||
| 181+ | 15x Nightmare (Lv.182) in 30 min | 6x 500 Galder Coupon | 1,610,000 | ||
| Found at: | |||||
| Leader Toy is found at Phantom School Annex - 2F Hallway. Arccomon is found at Phantom School - Music Room. Pale is found at Phantom School - Art Room. Nightmare is found at Phantom School Annex - 1F Hallway, Phantom School - Machine Room. | |||||
[edit]
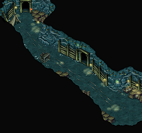
 | NPC: Shaman Girl Jia | Location: Phantom Dungeon - 1F Silent Hallway | |||
| Quest Cycles: Each 5 Time(s) | Condition: Level 170+ | ||||
| Level | Request | Reward | Base / TM | ||
| 170~180 | 25x Hell Book (Lv.175) in 10 min | 10,000 Galder | 2,231,034 / 1,256,002 | ||
| 181+ | 25x Dark Ball (Lv.190) in 10 min | 15,000 Galder | 2,612,700 / 1,330,568 | ||
| Found at: | |||||
| Hell Book is found at Phantom Dungeon - 1F Silent Hallway and Phantom Dungeon 1-2. Dark Ball is found at Phantom Dungeon 1-3 and Phantom Dungeon 1-4. | |||||
[edit]
 | NPC: Officer Tera | Location: Swamp Mine - Silver Jewel | ||||
| Monster: Guard Mon (Lv.270) | Condition: Level 180~199, all party members must be in Swamp Mine - Silver Jewel. | |||||
| Party Members | Amount of Monsters | Time | Reward | Base / TM | ||
| 2 | 8x | in 10 min | 3x 10,000 Galder Coupon, 3x Chaos's Feather 185, or | ~ / ~ | ||
| 3 | 12x | |||||
| 4 | 16x | |||||
| 5 | 20x | |||||
| 6 | 24x | |||||
| Found at: | ||||||
| Guard Mon is found at 2nd Closed Lot of Silver Jewel. | 
| |||||
| Notes: Amount of experience fluctuates (depends mostly on the number of kills). | ||||||
Chaos Tower Quests
Floor 8
Hunter Yuri - Explore Chaos Tower 6 Bunny Maid - Chaotic Energies 6 Officer Tera - 8th Floor Party Quest Eclipse - Transfer to the Floor 8 Battlefield Eclipse - Enter 9th Floor
Floor 9
Hunter Yuri - Explore Chaos Tower 7 Bunny Maid - Chaotic Energies 7 Officer Tera - 9th Floor Party Quest Eclipse - Transfer to the Floor 9 Battlefield Eclipse - Enter 10th Floor
Floor 10
Hunter Yuri - Explore Chaos Tower 8 Bunny Maid - Chaotic Energies 8 Officer Tera - 10th Floor Party Quest Eclipse - Transfer to the Floor 10 Battlefield
Floor 11
Hunter Yuri - Explore Chaos Tower 9 Bunny Maid - Chaotic Energies 9 Officer Tera - 11th Floor Party Quest
Level 190+
[edit]
|
| 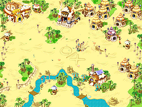 | NPC: Eclipse | Location: Beach Town - Paradise |
| Base Experience: 6,665,873 | TM Experience: 4,382,786 | ||
| Request: 3x Shadow Anchor | |||
| Quest Cycles: 1 Time(s) | Condition: Level 195+, use Mind's Eye, have completed The Story of the Gods 1 and have completed Shadow Star 2 at least once | ||
| Cycle 1: 10,000 Galder Coupon | |||
[edit]
| NPC: Stella | Location: Beach Town - Paradise | |
| Base Experience: 2,190,586 | TM Experience: None | ||
| Request: 5x Talisman of Darkness | |||
| Quest Cycles: 1 Time(s) | Condition: Level 195+, use Mind's Eye | ||
| Cycle 1: Star Card Pack No.5, 5x Half Pink Potion, 5x Half Blue Potion or Story of the Star Gazer Girl 2 | |||
|
Notes: | |||
[edit]
| NPC: Shaman Girl Jia | Location: Coral Town - Blooming Cora | |||
| Quest Cycles: Each 1 Time(s) | Condition: Level 180+, use Mind's Eye | ||||
| Level | Request | Reward | Base / TM | ||
| 180~183 | 3x Shadow Torobbie (Lv.324) in 15 min | 3x Half Pink Potion, 3x Half Blue Potion | 780,453 / 172,454 | ||
| 184~187 | 3x Shadow Bad Fury (Lv.327) in 10 min | 3x Half Pink Potion, 3x Half Blue Potion | 821,437 / 172,848 | ||
| 188~191 | 3x Shadow Little Cora (Lv.333) in 11 min | 3x Half Pink Potion, 3x Half Blue Potion | 866,748 / 173,876 | ||
| 192~195 | 3x Shadow Bustshell (Lv.339) in 11 min | 3x Half Pink Potion, 3x Half Blue Potion | 913,564 / 175,437 | ||
| 196+ | 3x Shadow Addax (Lv.349) in 10 min | 3x Half Pink Potion, 3x Half Blue Potion | 966,459 / 180,635 | ||
| Found at: | |||||
| Shadow Torobbie is found at Coral Beach Field 1 - Blue Wave. Shadow Bad Fury is found at Coral Beach Field 2 - Passionate Sun. Shadow Little Cora is found at Coral Beach Field 2 - Passionate Sun. Shadow Bustshell is found at Coral Beach Field 2 - Passionate Sun. Shadow Addax is found at Coral Beach - Dark Cave. | |||||
[edit]
| NPC: Shaman Girl Jia | Location: Beach Town - Paradise | |||
| Quest Cycles: Each 1 Time(s) | Condition: Level 195+, Mind's Eye | ||||
| Level | Request | Reward | Base / TM | ||
| 195~198 | 3x Shadow Fanta Slime (Lv.351) in 12 min | 3x Half Pink Potion, 3x Half Blue Potion | 958,120 / 179,988 | ||
| 199~202 | 3x Shadow Hula Octopus (Lv.355) in 12 min | 3x Half Pink Potion, 3x Half Blue Potion | 1,005,645 / 186,380 | ||
| 203~205 | 3x Shadow Sea Scorpion (Lv.357) in 11 min | 3x Half Pink Potion, 3x Half Blue Potion | 1,052,078 / 194,400 | ||
| 206~209 | 3x Shadow Oran G (Lv.362) in 11 min | 3x Half Pink Potion, 3x Half Blue Potion | 1,092,103 / 201,089 | ||
| 210+ | 3x Shadow Basic Mummy (Lv.370) in 10 min | 3x Half Pink Potion, 3x Half Blue Potion | 1,148,693 / 210,217 | ||
| Found at: | |||||
| Shadow Fanta Slime is found at Desert Beach Field 1 - Delta Island. Shadow Hula Octopus is found at Desert Beach Field 2 - Sand Palace. Shadow Sea Scorpion is found at Desert Beach Field 3 - Statue of Anubis. Shadow Oran G is found at Pyramid Dungeon 1 - Hall of the Slave. Shadow Basic Mummy is found at Pyramid Dungeon 3 / 4 / 6. | |||||
[edit]
 | NPC: Shaman Girl Jia | Location: Phantom Dungeon - 2F Chilly Hallway | |||
| Quest Cycles: Each 5 Time(s) | Condition: Level 190+ | ||||
| Level | Request | Reward | Base / TM | ||
| 190~200 | 10x Blanket Ghost (Lv.200) in 25 min | 30,000 Galder | 2,943,600 / 1,345,886 | ||
| 201+ | 10x Undead Stranger (Lv.210) in 25 min | 35,000 Galder | 3,370,492 / 1,455,736 | ||
| Found at: | |||||
| Blanket Ghost is found at Phantom Dungeon 2-1 / 2-2 / 2-4. Undead Stranger is found at Phantom Dungeon 2-4. | |||||
[edit]
| NPC: Love Hunter Robin | Location: Gate of Blue Ice Dungeon | ||||
| Quest Cycles: Each 5 Time(s) | Condition: Level 180+ | ||||
| Level | Request | Reward | TM | ||
| 180~183 | 20x Niwerth (Lv.252) in 10 min | 10x 500 Galder Coupon, 2x 10,000 Galder Coupon | 1,418,387 | ||
| 184~187 | 20x Freyr (Lv.259) in 10 min | 10x 500 Galder Coupon, 2x 10,000 Galder Coupon | 1,429,661 | ||
| 188~191 | 20x Freyja (Lv.264) in 10 min | 10x 500 Galder Coupon, 2x 10,000 Galder Coupon | 1,437,207 | ||
| 192~195 | 20x Coolem (Lv.272) in 15 min | 10x 500 Galder Coupon, 2x 10,000 Galder Coupon | 1,454,811 | ||
| 196+ | 20x Giant Coolem (Lv.277) in 10 min | 10x 500 Galder Coupon, 2x 10,000 Galder Coupon | 1,495,614 | ||
| Found at: | |||||
| Niwerth is found at Ice Dungeon 1 - Cave of Dark Blue. Freyr is found at Ice Dungeon 1 / 2. Freyja is found at Ice Dungeon 1 / 2 / 3. Coolem is found at Ice Dungeon 2 / 3 / 4. Giant Coolem is found at Ice Dungeon 4 - Teardrop Walkways. | |||||
