|
| NPC: Dr. Cat
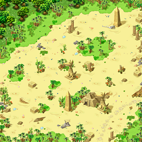
| Location: Desert Beach Field 3 - Statue of Anubis
|
| Base Experience: 58,030
| TM Experience: 48,184
|
| Request: Sephira's Magic Stone, Louie's Magic Stone
|
| Quest Cycles: 1 Time(s)
| Condition: Level 30+, Female Character
|
| Cycle 1: 50x Moonlight Water
|
| Cycle {{{Cycle_2}}}: {{{Reward_2}}}
|
| Cycle {{{Cycle_3}}}: {{{Reward_3}}}
|
| Cycle {{{Cycle_4}}}: {{{Reward_4}}}
|
| Cycle {{{Cycle_5}}}: {{{Reward_5}}}
|
| Cycle {{{Cycle_6}}}: {{{Reward_6}}}
|
| Cycle {{{Cycle_7}}}: {{{Reward_7}}}
|
| Cycle {{{Cycle_8}}}: {{{Reward_8}}}
|
| Cycle {{{Cycle_9}}}: {{{Reward_9}}}
|
| Cycle {{{Cycle_10}}}: {{{Reward_10}}}
|
| Cycle {{{Cycle_11}}}: {{{Reward_11}}}
|
| Cycle {{{Cycle_12}}}: {{{Reward_12}}}
|
| Cycle {{{Cycle_13}}}: {{{Reward_13}}}
|
| Cycle {{{Cycle_14}}}: {{{Reward_14}}}
|
| Cycle {{{Cycle_15}}}: {{{Reward_15}}}
|
| Cycle {{{Cycle_16}}}: {{{Reward_16}}}
|
| Cycle {{{Cycle_17}}}: {{{Reward_17}}}
|
| Cycle {{{Cycle_18}}}: {{{Reward_18}}}
|
| Cycle {{{Cycle_19}}}: {{{Reward_19}}}
|
| Cycle {{{Cycle_20}}}: {{{Reward_20}}}
|
|
|

|
| NPC: Magician Sephira
| Location: Path to Desert Beach
|
| Base Experience: 54,403
| TM Experience: 45,173
|
| Request: Magic Stone, Moon's Waterdrop
|
| Quest Cycles: 5 Time(s)
| Condition: Level 30+, Female Character
|
| Cycle 1~4: 50x Moonlight
|
| Cycle 5: Sephira's Magic Stone
|
| Cycle {{{Cycle_3}}}: {{{Reward_3}}}
|
| Cycle {{{Cycle_4}}}: {{{Reward_4}}}
|
| Cycle {{{Cycle_5}}}: {{{Reward_5}}}
|
| Cycle {{{Cycle_6}}}: {{{Reward_6}}}
|
| Cycle {{{Cycle_7}}}: {{{Reward_7}}}
|
| Cycle {{{Cycle_8}}}: {{{Reward_8}}}
|
| Cycle {{{Cycle_9}}}: {{{Reward_9}}}
|
| Cycle {{{Cycle_10}}}: {{{Reward_10}}}
|
| Cycle {{{Cycle_11}}}: {{{Reward_11}}}
|
| Cycle {{{Cycle_12}}}: {{{Reward_12}}}
|
| Cycle {{{Cycle_13}}}: {{{Reward_13}}}
|
| Cycle {{{Cycle_14}}}: {{{Reward_14}}}
|
| Cycle {{{Cycle_15}}}: {{{Reward_15}}}
|
| Cycle {{{Cycle_16}}}: {{{Reward_16}}}
|
| Cycle {{{Cycle_17}}}: {{{Reward_17}}}
|
| Cycle {{{Cycle_18}}}: {{{Reward_18}}}
|
| Cycle {{{Cycle_19}}}: {{{Reward_19}}}
|
| Cycle {{{Cycle_20}}}: {{{Reward_20}}}
|
|
|
|
|
| NPC: Dr. Cat
| Location: Desert Beach Field 3 - Statue of Anubis
|
| Base Experience: 58,030
| TM Experience: 48,184
|
| Request: Special Magic Gunpowder, Special Magic Bomb
|
| Quest Cycles: 1 Time(s)
| Condition: Level 30+, Male Character
|
| Cycle 1: 50x Moonlight Water
|
| Cycle {{{Cycle_2}}}: {{{Reward_2}}}
|
| Cycle {{{Cycle_3}}}: {{{Reward_3}}}
|
| Cycle {{{Cycle_4}}}: {{{Reward_4}}}
|
| Cycle {{{Cycle_5}}}: {{{Reward_5}}}
|
| Cycle {{{Cycle_6}}}: {{{Reward_6}}}
|
| Cycle {{{Cycle_7}}}: {{{Reward_7}}}
|
| Cycle {{{Cycle_8}}}: {{{Reward_8}}}
|
| Cycle {{{Cycle_9}}}: {{{Reward_9}}}
|
| Cycle {{{Cycle_10}}}: {{{Reward_10}}}
|
| Cycle {{{Cycle_11}}}: {{{Reward_11}}}
|
| Cycle {{{Cycle_12}}}: {{{Reward_12}}}
|
| Cycle {{{Cycle_13}}}: {{{Reward_13}}}
|
| Cycle {{{Cycle_14}}}: {{{Reward_14}}}
|
| Cycle {{{Cycle_15}}}: {{{Reward_15}}}
|
| Cycle {{{Cycle_16}}}: {{{Reward_16}}}
|
| Cycle {{{Cycle_17}}}: {{{Reward_17}}}
|
| Cycle {{{Cycle_18}}}: {{{Reward_18}}}
|
| Cycle {{{Cycle_19}}}: {{{Reward_19}}}
|
| Cycle {{{Cycle_20}}}: {{{Reward_20}}}
|
|
|
|
|
| NPC: Magician Sephira
| Location: Path to Desert Beach
|
| Base Experience: 54,403
| TM Experience: 45,173
|
| Request: Cornerstone, Piece of Sulfer, Soot
|
| Quest Cycles: 5 Time(s)
| Condition: Level 30+, Male Character
|
| Cycle 1~4: 50x Moonlight
|
| Cycle 5: Special Magic Gunpowder
|
| Cycle {{{Cycle_3}}}: {{{Reward_3}}}
|
| Cycle {{{Cycle_4}}}: {{{Reward_4}}}
|
| Cycle {{{Cycle_5}}}: {{{Reward_5}}}
|
| Cycle {{{Cycle_6}}}: {{{Reward_6}}}
|
| Cycle {{{Cycle_7}}}: {{{Reward_7}}}
|
| Cycle {{{Cycle_8}}}: {{{Reward_8}}}
|
| Cycle {{{Cycle_9}}}: {{{Reward_9}}}
|
| Cycle {{{Cycle_10}}}: {{{Reward_10}}}
|
| Cycle {{{Cycle_11}}}: {{{Reward_11}}}
|
| Cycle {{{Cycle_12}}}: {{{Reward_12}}}
|
| Cycle {{{Cycle_13}}}: {{{Reward_13}}}
|
| Cycle {{{Cycle_14}}}: {{{Reward_14}}}
|
| Cycle {{{Cycle_15}}}: {{{Reward_15}}}
|
| Cycle {{{Cycle_16}}}: {{{Reward_16}}}
|
| Cycle {{{Cycle_17}}}: {{{Reward_17}}}
|
| Cycle {{{Cycle_18}}}: {{{Reward_18}}}
|
| Cycle {{{Cycle_19}}}: {{{Reward_19}}}
|
| Cycle {{{Cycle_20}}}: {{{Reward_20}}}
|
|
|

|
| NPC: Magician Louie
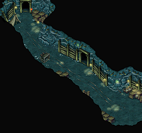
| Location: Desert Beach Mine - Crystal Copper
|
| Quest Cycles: Each 5 Time(s)
| Condition: Level 30+
|
| Level
| Request
| Reward
| Base / TM
|
| 30~50
| 10x Standing Salamander 40 (Lv.40) in 10 min
| 50x Moonlight Water,
Louie's Exchange Ticket
| 16,535 / 13,730
|
| 51~90
| 10x Standing Salamander 60 (Lv.60) in 10 min
| 50x Moonlight Water,
Louie's Exchange Ticket
| 61,845 / 167,658
|
| 91~150
| 10x Standing Salamander 120 (Lv.120) in 10 min
| 50x Moonlight Water,
Louie's Exchange Ticket
| 262,804 / 366,854
|
| 151+
| 10x Standing Salamander 200 (Lv.200) in 10 min
| 50x Moonlight Water,
Louie's Exchange Ticket
| 917,195 / 583,002
|
| {{{Level_5}}}
| {{{Qt_5}}}x [[{{{Monster_5}}}]] (Lv.{{{LvM_5}}}) in {{{Time_5}}}
| {{{Reward_5}}}
| {{{Exp_5}}}
|
| Found at:
|
Standing Salamander 40 is found at Southeast Forest and Southwest Forest.
Standing Salamander 60 is found at Relics Field 1 - Atlas and Relics Field 4 - An Altar for Sacrifice.
Standing Salamander 120 is found at Seabed Field 1 - North and Seabed Field 4 - Undersea Grave.
Standing Salamander 200 is found at Swamp Field 1 - Black Hole and Swamp Field 4 - Dark Omen.
| 
|
|
Notes: {{{Notes}}}
|
|
|
| NPC: Dr. Cat
| Location: Desert Beach Field 3 - Statue of Anubis
|
| Base Experience: 55,267
| TM Experience: 45,890
|
| Request: 20x Crystal Moon Golem's Soul
|
| Quest Cycles: 4 Time(s)
| Condition: Level 30+, Male Character, have completed Dr. Cat - Dr. Cat's Research Request (Female or Male Characters)
|
| Cycle 1~4: 25x Moonlight, 25x Moonlight Water, Dr. Tango's Letter of Appreciation
|
| Cycle {{{Cycle_2}}}: {{{Reward_2}}}
|
| Cycle {{{Cycle_3}}}: {{{Reward_3}}}
|
| Cycle {{{Cycle_4}}}: {{{Reward_4}}}
|
| Cycle {{{Cycle_5}}}: {{{Reward_5}}}
|
| Cycle {{{Cycle_6}}}: {{{Reward_6}}}
|
| Cycle {{{Cycle_7}}}: {{{Reward_7}}}
|
| Cycle {{{Cycle_8}}}: {{{Reward_8}}}
|
| Cycle {{{Cycle_9}}}: {{{Reward_9}}}
|
| Cycle {{{Cycle_10}}}: {{{Reward_10}}}
|
| Cycle {{{Cycle_11}}}: {{{Reward_11}}}
|
| Cycle {{{Cycle_12}}}: {{{Reward_12}}}
|
| Cycle {{{Cycle_13}}}: {{{Reward_13}}}
|
| Cycle {{{Cycle_14}}}: {{{Reward_14}}}
|
| Cycle {{{Cycle_15}}}: {{{Reward_15}}}
|
| Cycle {{{Cycle_16}}}: {{{Reward_16}}}
|
| Cycle {{{Cycle_17}}}: {{{Reward_17}}}
|
| Cycle {{{Cycle_18}}}: {{{Reward_18}}}
|
| Cycle {{{Cycle_19}}}: {{{Reward_19}}}
|
| Cycle {{{Cycle_20}}}: {{{Reward_20}}}
|
|
|
Magician Louie - Exchange
|
|
|
| NPC: Magician Louie
| Location: Desert Beach Mine - Crystal Copper
|

Louie's Magic Stone
| 0g
|  x5 x5
Louie's Exchange Ticket
|
|
|
|
|
|
|
|
|

Special Magic Bomb
| 0g
| x5
Louie's Exchange Ticket
|
|
|
|
|
|
|
|
|
Louie's Magic Stone
| 0g
| x1
Special Magic Bomb
|
|
|
|
|
|
|
|
|
Special Magic Bomb
| 0g
| x1
Louie's Magic Stone
|
|
|
|
|
|
|
|
|
[[Image:{{{ImageE}}}.gif]]
[[{{{ItemE}}}]]
| {{{FeeE}}}g
| [[Image:{{{ImageE1}}}.gif]] x{{{CompE1Qty}}}
[[{{{CompE1}}}]]
|
|
|
|
|
|
|
|
|
[[Image:{{{ImageF}}}.gif]]
[[{{{ItemF}}}]]
| {{{FeeF}}}g
| [[Image:{{{ImageF1}}}.gif]] x{{{CompF1Qty}}}
[[{{{CompF1}}}]]
|
|
|
|
|
|
|
|
|
[[Image:{{{ImageG}}}.gif]]
[[{{{ItemG}}}]]
| {{{FeeG}}}g
| [[Image:{{{ImageG1}}}.gif]] x{{{CompG1Qty}}}
[[{{{CompG1}}}]]
|
|
|
|
|
|
|
|
|
[[Image:{{{ImageH}}}.gif]]
[[{{{ItemH}}}]]
| {{{FeeH}}}g
| [[Image:{{{ImageH1}}}.gif]] x{{{CompH1Qty}}}
[[{{{CompH1}}}]]
|
|
|
|
|
|
|
|
|
[[Image:{{{ImageI}}}.gif]]
[[{{{ItemI}}}]]
| {{{FeeI}}}g
| [[Image:{{{ImageI1}}}.gif]] x{{{CompI1Qty}}}
[[{{{CompI1}}}]]
|
|
|
|
|
|
|
|
|
[[Image:{{{ImageJ}}}.gif]]
[[{{{ItemJ}}}]]
| {{{FeeJ}}}g
| [[Image:{{{ImageJ1}}}.gif]] x{{{CompJ1Qty}}}
[[{{{CompJ1}}}]]
|
|
|
|
|
|
|
|
|
[[Image:{{{ImageK}}}.gif]]
[[{{{ItemK}}}]]
| {{{FeeK}}}g
| [[Image:{{{ImageK1}}}.gif]] x{{{CompK1Qty}}}
[[{{{CompK1}}}]]
|
|
|
|
|
|
|
|
|
[[Image:{{{ImageL}}}.gif]]
[[{{{ItemL}}}]]
| {{{FeeL}}}g
| [[Image:{{{ImageL1}}}.gif]] x{{{CompL1Qty}}}
[[{{{CompL1}}}]]
|
|
|
|
|
|
|
|
|
[[Image:{{{ImageM}}}.gif]]
[[{{{ItemM}}}]]
| {{{FeeM}}}g
| [[Image:{{{ImageM1}}}.gif]] x{{{CompM1Qty}}}
[[{{{CompM1}}}]]
|
|
|
|
|
|
|
|
|
[[Image:{{{ImageN}}}.gif]]
[[{{{ItemN}}}]]
| {{{FeeN}}}g
| [[Image:{{{ImageN1}}}.gif]] x{{{CompN1Qty}}}
[[{{{CompN1}}}]]
|
|
|
|
|
|
|
|
|
[[Image:{{{ImageO}}}.gif]]
[[{{{ItemO}}}]]
| {{{FeeO}}}g
| [[Image:{{{ImageO1}}}.gif]] x{{{CompO1Qty}}}
[[{{{CompO1}}}]]
|
|
|
|
|
|
|
|
|
[[Image:{{{ImageP}}}.gif]]
[[{{{ItemP}}}]]
| {{{FeeP}}}g
| [[Image:{{{ImageP1}}}.gif]] x{{{CompP1Qty}}}
[[{{{CompP1}}}]]
|
|
|
|
|
|
|
|
|
[[Image:{{{ImageQ}}}.gif]]
[[{{{ItemQ}}}]]
| {{{FeeQ}}}g
| [[Image:{{{ImageQ1}}}.gif]] x{{{CompQ1Qty}}}
[[{{{CompQ1}}}]]
|
|
|
|
|
|
|
|
|
[[Image:{{{ImageR}}}.gif]]
[[{{{ItemR}}}]]
| {{{FeeR}}}g
| [[Image:{{{ImageR1}}}.gif]] x{{{CompR1Qty}}}
[[{{{CompR1}}}]]
|
|
|
|
|
|
|
|
|
[[Image:{{{ImageS}}}.gif]]
[[{{{ItemS}}}]]
| {{{FeeS}}}g
| [[Image:{{{ImageS1}}}.gif]] x{{{CompS1Qty}}}
[[{{{CompS1}}}]]
|
|
|
|
|
|
|
|
|
[[Image:{{{ImageT}}}.gif]]
[[{{{ItemT}}}]]
| {{{FeeT}}}g
| [[Image:{{{ImageT1}}}.gif]] x{{{CompT1Qty}}}
[[{{{CompT1}}}]]
|
|
|
|
|
|
|
|
|
[[Image:{{{ImageU}}}.gif]]
[[{{{ItemU}}}]]
| {{{FeeU}}}g
| [[Image:{{{ImageU1}}}.gif]] x{{{CompU1Qty}}}
[[{{{CompU1}}}]]
|
|
|
|
|
|
|
|
|
[[Image:{{{ImageV}}}.gif]]
[[{{{ItemV}}}]]
| {{{FeeV}}}g
| [[Image:{{{ImageV1}}}.gif]] x{{{CompV1Qty}}}
[[{{{CompV1}}}]]
|
|
|
|
|
|
|
|
|
[[Image:{{{ImageW}}}.gif]]
[[{{{ItemW}}}]]
| {{{FeeW}}}g
| [[Image:{{{ImageW1}}}.gif]] x{{{CompW1Qty}}}
[[{{{CompW1}}}]]
|
|
|
|
|
|
|
|
|
[[Image:{{{ImageY}}}.gif]]
[[{{{ItemY}}}]]
| {{{FeeY}}}g
| [[Image:{{{ImageY1}}}.gif]] x{{{CompY1Qty}}}
[[{{{CompY1}}}]]
|
|
|
|
|
|
|
|
|
[[Image:{{{ImageZ}}}.gif]]
[[{{{ItemZ}}}]]
| {{{FeeZ}}}g
| [[Image:{{{ImageZ1}}}.gif]] x{{{CompZ1Qty}}}
[[{{{CompZ1}}}]]
|
|
|
|
|
|
|
|
|
| Notes: Magician Louie offers the exchange after completing Magician Louie - Magician Louie Making Magic. Louie's Exchange Ticket is obtained by completing Magician Louie - Magician Louie Making Magic.
|