|
| NPC: Werewolf Lycan
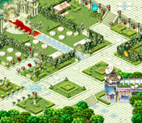
| Location: Event Garden - Ceremonia
|
| Base Experience: 3,528
| TM Experience: 2,573
|
| Request: Rosetta's Note
|
| Quest Cycles: 1 Time(s)
| Condition: Level 10, have Returned Time Trap Stone in the inventory
|
| Cycle 1: Lycan's Note, Lycan's Blue Sword, Lycan's Blue Shield
|
| Cycle {{{Cycle_2}}}: {{{Reward_2}}}
|
| Cycle {{{Cycle_3}}}: {{{Reward_3}}}
|
| Cycle {{{Cycle_4}}}: {{{Reward_4}}}
|
| Cycle {{{Cycle_5}}}: {{{Reward_5}}}
|
| Cycle {{{Cycle_6}}}: {{{Reward_6}}}
|
| Cycle {{{Cycle_7}}}: {{{Reward_7}}}
|
| Cycle {{{Cycle_8}}}: {{{Reward_8}}}
|
| Cycle {{{Cycle_9}}}: {{{Reward_9}}}
|
| Cycle {{{Cycle_10}}}: {{{Reward_10}}}
|
| Cycle {{{Cycle_11}}}: {{{Reward_11}}}
|
| Cycle {{{Cycle_12}}}: {{{Reward_12}}}
|
| Cycle {{{Cycle_13}}}: {{{Reward_13}}}
|
| Cycle {{{Cycle_14}}}: {{{Reward_14}}}
|
| Cycle {{{Cycle_15}}}: {{{Reward_15}}}
|
| Cycle {{{Cycle_16}}}: {{{Reward_16}}}
|
| Cycle {{{Cycle_17}}}: {{{Reward_17}}}
|
| Cycle {{{Cycle_18}}}: {{{Reward_18}}}
|
| Cycle {{{Cycle_19}}}: {{{Reward_19}}}
|
| Cycle {{{Cycle_20}}}: {{{Reward_20}}}
|
|
|

|
| NPC: Horse Hiddink
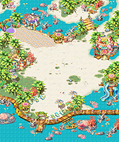
| Location: Coral Town - Blooming Cora
|
| Base Experience: 3,414
| TM Experience: 2,490
|
| Request: 5x Carrot Shaved Ice
|
| Quest Cycles: 1 Time(s)
| Condition: Have Werewolf Lycan - Time Trap Stone for Rosetta in quest log
|
| Cycle 1: 20x Bubble Gum
|
| Cycle {{{Cycle_2}}}: {{{Reward_2}}}
|
| Cycle {{{Cycle_3}}}: {{{Reward_3}}}
|
| Cycle {{{Cycle_4}}}: {{{Reward_4}}}
|
| Cycle {{{Cycle_5}}}: {{{Reward_5}}}
|
| Cycle {{{Cycle_6}}}: {{{Reward_6}}}
|
| Cycle {{{Cycle_7}}}: {{{Reward_7}}}
|
| Cycle {{{Cycle_8}}}: {{{Reward_8}}}
|
| Cycle {{{Cycle_9}}}: {{{Reward_9}}}
|
| Cycle {{{Cycle_10}}}: {{{Reward_10}}}
|
| Cycle {{{Cycle_11}}}: {{{Reward_11}}}
|
| Cycle {{{Cycle_12}}}: {{{Reward_12}}}
|
| Cycle {{{Cycle_13}}}: {{{Reward_13}}}
|
| Cycle {{{Cycle_14}}}: {{{Reward_14}}}
|
| Cycle {{{Cycle_15}}}: {{{Reward_15}}}
|
| Cycle {{{Cycle_16}}}: {{{Reward_16}}}
|
| Cycle {{{Cycle_17}}}: {{{Reward_17}}}
|
| Cycle {{{Cycle_18}}}: {{{Reward_18}}}
|
| Cycle {{{Cycle_19}}}: {{{Reward_19}}}
|
| Cycle {{{Cycle_20}}}: {{{Reward_20}}}
|
|
|

|
| NPC: Prince Sebastian
| Location: Coral Town - Blooming Cora
|
| Base Experience: 1,984
| TM Experience: 1,447
|
| Request: 10x Red Beans, 5x Carrot, 3x Ice Cube
|
| Quest Cycles: 5 Time(s)
| Condition: Have Horse Hiddink - Help Hungry Horse Hiddink in quest log
|
| Cycle 1~5: Carrot Shaved Ice, 6x Blue Soft Ice
|
| Cycle {{{Cycle_2}}}: {{{Reward_2}}}
|
| Cycle {{{Cycle_3}}}: {{{Reward_3}}}
|
| Cycle {{{Cycle_4}}}: {{{Reward_4}}}
|
| Cycle {{{Cycle_5}}}: {{{Reward_5}}}
|
| Cycle {{{Cycle_6}}}: {{{Reward_6}}}
|
| Cycle {{{Cycle_7}}}: {{{Reward_7}}}
|
| Cycle {{{Cycle_8}}}: {{{Reward_8}}}
|
| Cycle {{{Cycle_9}}}: {{{Reward_9}}}
|
| Cycle {{{Cycle_10}}}: {{{Reward_10}}}
|
| Cycle {{{Cycle_11}}}: {{{Reward_11}}}
|
| Cycle {{{Cycle_12}}}: {{{Reward_12}}}
|
| Cycle {{{Cycle_13}}}: {{{Reward_13}}}
|
| Cycle {{{Cycle_14}}}: {{{Reward_14}}}
|
| Cycle {{{Cycle_15}}}: {{{Reward_15}}}
|
| Cycle {{{Cycle_16}}}: {{{Reward_16}}}
|
| Cycle {{{Cycle_17}}}: {{{Reward_17}}}
|
| Cycle {{{Cycle_18}}}: {{{Reward_18}}}
|
| Cycle {{{Cycle_19}}}: {{{Reward_19}}}
|
| Cycle {{{Cycle_20}}}: {{{Reward_20}}}
|
|
|

|
| NPC: Princess Rosetta
| Location: Southwest Forest
|
| Base Experience: 3,528
| TM Experience: 2,573
|
| Request: Complete Servant Alfredo - A Book Lover's Request
|
| Quest Cycles: 1 Time(s)
| Condition: Complete Horse Hiddink - Help Hungry Horse Hiddink
|
| Cycle 1: Rosetta's Note
|
| Cycle {{{Cycle_2}}}: {{{Reward_2}}}
|
| Cycle {{{Cycle_3}}}: {{{Reward_3}}}
|
| Cycle {{{Cycle_4}}}: {{{Reward_4}}}
|
| Cycle {{{Cycle_5}}}: {{{Reward_5}}}
|
| Cycle {{{Cycle_6}}}: {{{Reward_6}}}
|
| Cycle {{{Cycle_7}}}: {{{Reward_7}}}
|
| Cycle {{{Cycle_8}}}: {{{Reward_8}}}
|
| Cycle {{{Cycle_9}}}: {{{Reward_9}}}
|
| Cycle {{{Cycle_10}}}: {{{Reward_10}}}
|
| Cycle {{{Cycle_11}}}: {{{Reward_11}}}
|
| Cycle {{{Cycle_12}}}: {{{Reward_12}}}
|
| Cycle {{{Cycle_13}}}: {{{Reward_13}}}
|
| Cycle {{{Cycle_14}}}: {{{Reward_14}}}
|
| Cycle {{{Cycle_15}}}: {{{Reward_15}}}
|
| Cycle {{{Cycle_16}}}: {{{Reward_16}}}
|
| Cycle {{{Cycle_17}}}: {{{Reward_17}}}
|
| Cycle {{{Cycle_18}}}: {{{Reward_18}}}
|
| Cycle {{{Cycle_19}}}: {{{Reward_19}}}
|
| Cycle {{{Cycle_20}}}: {{{Reward_20}}}
|
|
Notes: {{{Notes}}}
|

|
| NPC: Servant Alfredo
| Location: Southwest Forest
|
| Base Experience: 3,528
| TM Experience: 2,573
|
| Request: Serial Hammer Assault Vol2, Serial Hammer Assault Vol3, Serial Hammer Assault Vol4, Serial Hammer Assault Vol5
|
| Quest Cycles: 1 Time(s)
| Condition: Have Princess Rosetta - About a Lycan in quest log, have Serial Hammer Assault Vol1 in inventory
|
| Cycle 1: 20x Pink Soft Ice
|
| Cycle {{{Cycle_2}}}: {{{Reward_2}}}
|
| Cycle {{{Cycle_3}}}: {{{Reward_3}}}
|
| Cycle {{{Cycle_4}}}: {{{Reward_4}}}
|
| Cycle {{{Cycle_5}}}: {{{Reward_5}}}
|
| Cycle {{{Cycle_6}}}: {{{Reward_6}}}
|
| Cycle {{{Cycle_7}}}: {{{Reward_7}}}
|
| Cycle {{{Cycle_8}}}: {{{Reward_8}}}
|
| Cycle {{{Cycle_9}}}: {{{Reward_9}}}
|
| Cycle {{{Cycle_10}}}: {{{Reward_10}}}
|
| Cycle {{{Cycle_11}}}: {{{Reward_11}}}
|
| Cycle {{{Cycle_12}}}: {{{Reward_12}}}
|
| Cycle {{{Cycle_13}}}: {{{Reward_13}}}
|
| Cycle {{{Cycle_14}}}: {{{Reward_14}}}
|
| Cycle {{{Cycle_15}}}: {{{Reward_15}}}
|
| Cycle {{{Cycle_16}}}: {{{Reward_16}}}
|
| Cycle {{{Cycle_17}}}: {{{Reward_17}}}
|
| Cycle {{{Cycle_18}}}: {{{Reward_18}}}
|
| Cycle {{{Cycle_19}}}: {{{Reward_19}}}
|
| Cycle {{{Cycle_20}}}: {{{Reward_20}}}
|
|
|
Anubis - Exchange
|

|
| NPC: Anubis
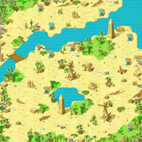
| Location: Beach Field 6 - Statue of Anubis
|

Lycan's Blue Hat
| 0g
|  x15 x15
Ancient Club
| +
|  x15 x15
Ancient Jewel
| +
|  x15 x15
Ancient Adornment
| +
|  x15 x15
Ancient Mask
|
|
|
[[Image:{{{ImageB}}}.gif]]
[[{{{ItemB}}}]]
| {{{FeeB}}}g
| [[Image:{{{ImageB1}}}.gif]] x{{{CompB1Qty}}}
[[{{{CompB1}}}]]
|
|
|
|
|
|
|
|
|
[[Image:{{{ImageC}}}.gif]]
[[{{{ItemC}}}]]
| {{{FeeC}}}g
| [[Image:{{{ImageC1}}}.gif]] x{{{CompC1Qty}}}
[[{{{CompC1}}}]]
|
|
|
|
|
|
|
|
|
[[Image:{{{ImageD}}}.gif]]
[[{{{ItemD}}}]]
| {{{FeeD}}}g
| [[Image:{{{ImageD1}}}.gif]] x{{{CompD1Qty}}}
[[{{{CompD1}}}]]
|
|
|
|
|
|
|
|
|
[[Image:{{{ImageE}}}.gif]]
[[{{{ItemE}}}]]
| {{{FeeE}}}g
| [[Image:{{{ImageE1}}}.gif]] x{{{CompE1Qty}}}
[[{{{CompE1}}}]]
|
|
|
|
|
|
|
|
|
[[Image:{{{ImageF}}}.gif]]
[[{{{ItemF}}}]]
| {{{FeeF}}}g
| [[Image:{{{ImageF1}}}.gif]] x{{{CompF1Qty}}}
[[{{{CompF1}}}]]
|
|
|
|
|
|
|
|
|
[[Image:{{{ImageG}}}.gif]]
[[{{{ItemG}}}]]
| {{{FeeG}}}g
| [[Image:{{{ImageG1}}}.gif]] x{{{CompG1Qty}}}
[[{{{CompG1}}}]]
|
|
|
|
|
|
|
|
|
[[Image:{{{ImageH}}}.gif]]
[[{{{ItemH}}}]]
| {{{FeeH}}}g
| [[Image:{{{ImageH1}}}.gif]] x{{{CompH1Qty}}}
[[{{{CompH1}}}]]
|
|
|
|
|
|
|
|
|
[[Image:{{{ImageI}}}.gif]]
[[{{{ItemI}}}]]
| {{{FeeI}}}g
| [[Image:{{{ImageI1}}}.gif]] x{{{CompI1Qty}}}
[[{{{CompI1}}}]]
|
|
|
|
|
|
|
|
|
[[Image:{{{ImageJ}}}.gif]]
[[{{{ItemJ}}}]]
| {{{FeeJ}}}g
| [[Image:{{{ImageJ1}}}.gif]] x{{{CompJ1Qty}}}
[[{{{CompJ1}}}]]
|
|
|
|
|
|
|
|
|
[[Image:{{{ImageK}}}.gif]]
[[{{{ItemK}}}]]
| {{{FeeK}}}g
| [[Image:{{{ImageK1}}}.gif]] x{{{CompK1Qty}}}
[[{{{CompK1}}}]]
|
|
|
|
|
|
|
|
|
[[Image:{{{ImageL}}}.gif]]
[[{{{ItemL}}}]]
| {{{FeeL}}}g
| [[Image:{{{ImageL1}}}.gif]] x{{{CompL1Qty}}}
[[{{{CompL1}}}]]
|
|
|
|
|
|
|
|
|
[[Image:{{{ImageM}}}.gif]]
[[{{{ItemM}}}]]
| {{{FeeM}}}g
| [[Image:{{{ImageM1}}}.gif]] x{{{CompM1Qty}}}
[[{{{CompM1}}}]]
|
|
|
|
|
|
|
|
|
[[Image:{{{ImageN}}}.gif]]
[[{{{ItemN}}}]]
| {{{FeeN}}}g
| [[Image:{{{ImageN1}}}.gif]] x{{{CompN1Qty}}}
[[{{{CompN1}}}]]
|
|
|
|
|
|
|
|
|
[[Image:{{{ImageO}}}.gif]]
[[{{{ItemO}}}]]
| {{{FeeO}}}g
| [[Image:{{{ImageO1}}}.gif]] x{{{CompO1Qty}}}
[[{{{CompO1}}}]]
|
|
|
|
|
|
|
|
|
[[Image:{{{ImageP}}}.gif]]
[[{{{ItemP}}}]]
| {{{FeeP}}}g
| [[Image:{{{ImageP1}}}.gif]] x{{{CompP1Qty}}}
[[{{{CompP1}}}]]
|
|
|
|
|
|
|
|
|
[[Image:{{{ImageQ}}}.gif]]
[[{{{ItemQ}}}]]
| {{{FeeQ}}}g
| [[Image:{{{ImageQ1}}}.gif]] x{{{CompQ1Qty}}}
[[{{{CompQ1}}}]]
|
|
|
|
|
|
|
|
|
[[Image:{{{ImageR}}}.gif]]
[[{{{ItemR}}}]]
| {{{FeeR}}}g
| [[Image:{{{ImageR1}}}.gif]] x{{{CompR1Qty}}}
[[{{{CompR1}}}]]
|
|
|
|
|
|
|
|
|
[[Image:{{{ImageS}}}.gif]]
[[{{{ItemS}}}]]
| {{{FeeS}}}g
| [[Image:{{{ImageS1}}}.gif]] x{{{CompS1Qty}}}
[[{{{CompS1}}}]]
|
|
|
|
|
|
|
|
|
[[Image:{{{ImageT}}}.gif]]
[[{{{ItemT}}}]]
| {{{FeeT}}}g
| [[Image:{{{ImageT1}}}.gif]] x{{{CompT1Qty}}}
[[{{{CompT1}}}]]
|
|
|
|
|
|
|
|
|
[[Image:{{{ImageU}}}.gif]]
[[{{{ItemU}}}]]
| {{{FeeU}}}g
| [[Image:{{{ImageU1}}}.gif]] x{{{CompU1Qty}}}
[[{{{CompU1}}}]]
|
|
|
|
|
|
|
|
|
[[Image:{{{ImageV}}}.gif]]
[[{{{ItemV}}}]]
| {{{FeeV}}}g
| [[Image:{{{ImageV1}}}.gif]] x{{{CompV1Qty}}}
[[{{{CompV1}}}]]
|
|
|
|
|
|
|
|
|
[[Image:{{{ImageW}}}.gif]]
[[{{{ItemW}}}]]
| {{{FeeW}}}g
| [[Image:{{{ImageW1}}}.gif]] x{{{CompW1Qty}}}
[[{{{CompW1}}}]]
|
|
|
|
|
|
|
|
|
[[Image:{{{ImageY}}}.gif]]
[[{{{ItemY}}}]]
| {{{FeeY}}}g
| [[Image:{{{ImageY1}}}.gif]] x{{{CompY1Qty}}}
[[{{{CompY1}}}]]
|
|
|
|
|
|
|
|
|
[[Image:{{{ImageZ}}}.gif]]
[[{{{ItemZ}}}]]
| {{{FeeZ}}}g
| [[Image:{{{ImageZ1}}}.gif]] x{{{CompZ1Qty}}}
[[{{{CompZ1}}}]]
|
|
|
|
|
|
|
|
|
Notes: Ancient Club, Ancient Jewel, Ancient Adornment, and Ancient Mask are obtained by open  Treasure Box of the Sun, that is drilled in all Caballa Island. Treasure Box of the Sun, that is drilled in all Caballa Island.
|