|
| NPC: Don Giuvanni
| Location: Event Garden - Ceremonia
|
| Base Experience: 9,327
| TM Experience: 5,976
|
| Request: 1st Dark Turkey Rune, 2nd Dark Turkey Rune, 3rd Dark Turkey Rune, 4th Dark Turkey Rune
|
| Quest Cycles: 1 Time(s)
| Condition: Level 15+
|
| Cycle 1: Turkey Voodoo Doll
|
| Cycle {{{Cycle_2}}}: {{{Reward_2}}}
|
| Cycle {{{Cycle_3}}}: {{{Reward_3}}}
|
| Cycle {{{Cycle_4}}}: {{{Reward_4}}}
|
| Cycle {{{Cycle_5}}}: {{{Reward_5}}}
|
| Cycle {{{Cycle_6}}}: {{{Reward_6}}}
|
| Cycle {{{Cycle_7}}}: {{{Reward_7}}}
|
| Cycle {{{Cycle_8}}}: {{{Reward_8}}}
|
| Cycle {{{Cycle_9}}}: {{{Reward_9}}}
|
| Cycle {{{Cycle_10}}}: {{{Reward_10}}}
|
| Cycle {{{Cycle_11}}}: {{{Reward_11}}}
|
| Cycle {{{Cycle_12}}}: {{{Reward_12}}}
|
| Cycle {{{Cycle_13}}}: {{{Reward_13}}}
|
| Cycle {{{Cycle_14}}}: {{{Reward_14}}}
|
| Cycle {{{Cycle_15}}}: {{{Reward_15}}}
|
| Cycle {{{Cycle_16}}}: {{{Reward_16}}}
|
| Cycle {{{Cycle_17}}}: {{{Reward_17}}}
|
| Cycle {{{Cycle_18}}}: {{{Reward_18}}}
|
| Cycle {{{Cycle_19}}}: {{{Reward_19}}}
|
| Cycle {{{Cycle_20}}}: {{{Reward_20}}}
|
|
|

|
| NPC: Don Giuvanni
| Location: Event Garden - Ceremonia
|
| Base Experience: 9,327
| TM Experience: 5,976
|
| Request: Turkey Voodoo Stick
|
| Quest Cycles: 1 Time(s)
| Condition: Level 15+, have complete Don Giuvanni - Thanksgiving Tragedy
|
| Cycle 1: Mighty Turkey
|
| Cycle {{{Cycle_2}}}: {{{Reward_2}}}
|
| Cycle {{{Cycle_3}}}: {{{Reward_3}}}
|
| Cycle {{{Cycle_4}}}: {{{Reward_4}}}
|
| Cycle {{{Cycle_5}}}: {{{Reward_5}}}
|
| Cycle {{{Cycle_6}}}: {{{Reward_6}}}
|
| Cycle {{{Cycle_7}}}: {{{Reward_7}}}
|
| Cycle {{{Cycle_8}}}: {{{Reward_8}}}
|
| Cycle {{{Cycle_9}}}: {{{Reward_9}}}
|
| Cycle {{{Cycle_10}}}: {{{Reward_10}}}
|
| Cycle {{{Cycle_11}}}: {{{Reward_11}}}
|
| Cycle {{{Cycle_12}}}: {{{Reward_12}}}
|
| Cycle {{{Cycle_13}}}: {{{Reward_13}}}
|
| Cycle {{{Cycle_14}}}: {{{Reward_14}}}
|
| Cycle {{{Cycle_15}}}: {{{Reward_15}}}
|
| Cycle {{{Cycle_16}}}: {{{Reward_16}}}
|
| Cycle {{{Cycle_17}}}: {{{Reward_17}}}
|
| Cycle {{{Cycle_18}}}: {{{Reward_18}}}
|
| Cycle {{{Cycle_19}}}: {{{Reward_19}}}
|
| Cycle {{{Cycle_20}}}: {{{Reward_20}}}
|
|
|

|
| NPC: Magician Sephira
| Location: Megalopolis Square
|
| Base Experience: 9,327
| TM Experience: 5,976
|
| Request: Turkey Voodoo Doll, Turkey A, Turkey B
|
| Quest Cycles: 1 Time(s)
| Condition: Level 15+, have complete Don Giuvanni - Thanksgiving Tragedy
|
| Cycle 1: Turkey Voodoo Stick
|
| Cycle {{{Cycle_2}}}: {{{Reward_2}}}
|
| Cycle {{{Cycle_3}}}: {{{Reward_3}}}
|
| Cycle {{{Cycle_4}}}: {{{Reward_4}}}
|
| Cycle {{{Cycle_5}}}: {{{Reward_5}}}
|
| Cycle {{{Cycle_6}}}: {{{Reward_6}}}
|
| Cycle {{{Cycle_7}}}: {{{Reward_7}}}
|
| Cycle {{{Cycle_8}}}: {{{Reward_8}}}
|
| Cycle {{{Cycle_9}}}: {{{Reward_9}}}
|
| Cycle {{{Cycle_10}}}: {{{Reward_10}}}
|
| Cycle {{{Cycle_11}}}: {{{Reward_11}}}
|
| Cycle {{{Cycle_12}}}: {{{Reward_12}}}
|
| Cycle {{{Cycle_13}}}: {{{Reward_13}}}
|
| Cycle {{{Cycle_14}}}: {{{Reward_14}}}
|
| Cycle {{{Cycle_15}}}: {{{Reward_15}}}
|
| Cycle {{{Cycle_16}}}: {{{Reward_16}}}
|
| Cycle {{{Cycle_17}}}: {{{Reward_17}}}
|
| Cycle {{{Cycle_18}}}: {{{Reward_18}}}
|
| Cycle {{{Cycle_19}}}: {{{Reward_19}}}
|
| Cycle {{{Cycle_20}}}: {{{Reward_20}}}
|
|
|

|
| NPC: Hunter Yuri
| Location: Event Garden - Ceremonia
|
| Quest Cycles: Each 25 Time(s)
| Condition: Level 15+, have complete Magician Sephira - Dinner For Sephira in quest log
|
| Level
| Request
| Reward
| Base / TM
|
| 15~40
| 15x Voodoo Shell Trap (Lv.22) in 15 min
| 5x Turkey A or 5x Turkey B or Strawberry Gift Box
| 2,486 / 1,593
|
| 41~70
| 15x Voodoo Forest Mantis (Lv.44) in 15 min
| 5x Turkey A or 5x Turkey B or Strawberry Gift Box
| 48,497 / 129,566
|
| 71~100
| 15x Voodoo Forest Wasp (Lv.77) in 15 min
| 5x Turkey A or 5x Turkey B or Strawberry Gift Box
| 113,404 / 254,143
|
| 101~140
| 15x Voodoo Stone Soldier (Lv.155) in 15 min
| 5x Turkey A or 5x Turkey B or Strawberry Gift Box
| 267,261 / 339,050
|
| 141+
| 15x Voodoo Mimic (Lv.288) in 15 min
| 5x Turkey A or 5x Turkey B or Strawberry Gift Box
| 601,808 / 458,699
|
| Found at:
|
Voodoo Shell Trap is found at Beach Field 2 - Center and Beach Field 6 - Statue of Anubis.
Voodoo Forest Mantis is found at Relics Field 1 - Atlas and Relics Field 4 - Altar of Round.
Voodoo Forest Wasp is found at Swamp Field 1 - Black Hole and Swamp Field 4 - Dark Omen.
Voodoo Stone Soldier is found at Rose Field 2 - Maze of Black Rose and Rose Field 3 - Maze of Blue Rose.
Voodoo Mimic is found at Snow Field 1 - Merry Christmas and Techichi Field 2.
|
|
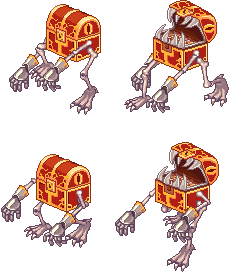
Notes: The Voodoo Monsters dropped  Melon Gift Box Melon Gift Box. Don't complete Sephira's quest right away so you can keep doing the monster quest. If you complete her quest you WON'T be able to do anymore of Yuri's quests.
|
Inventor Gale - Exchange
|

|
| NPC: Inventor Gale
| Location: Megalopolis Square
|

Melon Biscuit
| 0g
|  x1 x1
Melon Hat
| +
|  x1 x1
Melon Stick
| +
|  x1 x1
Melon Covered Shield
|
|
|
|
|

Strawberry Biscuit
| 0g
|  x1 x1
Strawberry Hat
| +
|  x1 x1
Strawberry Stick
| +
|  x1 x1
Berry Covered Shield
|
|
|
|
|

ChocoAlmond Biscuit
| 0g
|  x1 x1
Almond Hat
| +
|  x1 x1
ChocoAlmond Stick
| +
|  x1 x1
ChocoAlmond Shield
|
|
|
|
|
[[Image:{{{ImageD}}}.gif]]
[[{{{ItemD}}}]]
| {{{FeeD}}}g
| [[Image:{{{ImageD1}}}.gif]] x{{{CompD1Qty}}}
[[{{{CompD1}}}]]
|
|
|
|
|
|
|
|
|
[[Image:{{{ImageE}}}.gif]]
[[{{{ItemE}}}]]
| {{{FeeE}}}g
| [[Image:{{{ImageE1}}}.gif]] x{{{CompE1Qty}}}
[[{{{CompE1}}}]]
|
|
|
|
|
|
|
|
|
[[Image:{{{ImageF}}}.gif]]
[[{{{ItemF}}}]]
| {{{FeeF}}}g
| [[Image:{{{ImageF1}}}.gif]] x{{{CompF1Qty}}}
[[{{{CompF1}}}]]
|
|
|
|
|
|
|
|
|
[[Image:{{{ImageG}}}.gif]]
[[{{{ItemG}}}]]
| {{{FeeG}}}g
| [[Image:{{{ImageG1}}}.gif]] x{{{CompG1Qty}}}
[[{{{CompG1}}}]]
|
|
|
|
|
|
|
|
|
[[Image:{{{ImageH}}}.gif]]
[[{{{ItemH}}}]]
| {{{FeeH}}}g
| [[Image:{{{ImageH1}}}.gif]] x{{{CompH1Qty}}}
[[{{{CompH1}}}]]
|
|
|
|
|
|
|
|
|
[[Image:{{{ImageI}}}.gif]]
[[{{{ItemI}}}]]
| {{{FeeI}}}g
| [[Image:{{{ImageI1}}}.gif]] x{{{CompI1Qty}}}
[[{{{CompI1}}}]]
|
|
|
|
|
|
|
|
|
[[Image:{{{ImageJ}}}.gif]]
[[{{{ItemJ}}}]]
| {{{FeeJ}}}g
| [[Image:{{{ImageJ1}}}.gif]] x{{{CompJ1Qty}}}
[[{{{CompJ1}}}]]
|
|
|
|
|
|
|
|
|
[[Image:{{{ImageK}}}.gif]]
[[{{{ItemK}}}]]
| {{{FeeK}}}g
| [[Image:{{{ImageK1}}}.gif]] x{{{CompK1Qty}}}
[[{{{CompK1}}}]]
|
|
|
|
|
|
|
|
|
[[Image:{{{ImageL}}}.gif]]
[[{{{ItemL}}}]]
| {{{FeeL}}}g
| [[Image:{{{ImageL1}}}.gif]] x{{{CompL1Qty}}}
[[{{{CompL1}}}]]
|
|
|
|
|
|
|
|
|
[[Image:{{{ImageM}}}.gif]]
[[{{{ItemM}}}]]
| {{{FeeM}}}g
| [[Image:{{{ImageM1}}}.gif]] x{{{CompM1Qty}}}
[[{{{CompM1}}}]]
|
|
|
|
|
|
|
|
|
[[Image:{{{ImageN}}}.gif]]
[[{{{ItemN}}}]]
| {{{FeeN}}}g
| [[Image:{{{ImageN1}}}.gif]] x{{{CompN1Qty}}}
[[{{{CompN1}}}]]
|
|
|
|
|
|
|
|
|
[[Image:{{{ImageO}}}.gif]]
[[{{{ItemO}}}]]
| {{{FeeO}}}g
| [[Image:{{{ImageO1}}}.gif]] x{{{CompO1Qty}}}
[[{{{CompO1}}}]]
|
|
|
|
|
|
|
|
|
[[Image:{{{ImageP}}}.gif]]
[[{{{ItemP}}}]]
| {{{FeeP}}}g
| [[Image:{{{ImageP1}}}.gif]] x{{{CompP1Qty}}}
[[{{{CompP1}}}]]
|
|
|
|
|
|
|
|
|
[[Image:{{{ImageQ}}}.gif]]
[[{{{ItemQ}}}]]
| {{{FeeQ}}}g
| [[Image:{{{ImageQ1}}}.gif]] x{{{CompQ1Qty}}}
[[{{{CompQ1}}}]]
|
|
|
|
|
|
|
|
|
[[Image:{{{ImageR}}}.gif]]
[[{{{ItemR}}}]]
| {{{FeeR}}}g
| [[Image:{{{ImageR1}}}.gif]] x{{{CompR1Qty}}}
[[{{{CompR1}}}]]
|
|
|
|
|
|
|
|
|
[[Image:{{{ImageS}}}.gif]]
[[{{{ItemS}}}]]
| {{{FeeS}}}g
| [[Image:{{{ImageS1}}}.gif]] x{{{CompS1Qty}}}
[[{{{CompS1}}}]]
|
|
|
|
|
|
|
|
|
[[Image:{{{ImageT}}}.gif]]
[[{{{ItemT}}}]]
| {{{FeeT}}}g
| [[Image:{{{ImageT1}}}.gif]] x{{{CompT1Qty}}}
[[{{{CompT1}}}]]
|
|
|
|
|
|
|
|
|
[[Image:{{{ImageU}}}.gif]]
[[{{{ItemU}}}]]
| {{{FeeU}}}g
| [[Image:{{{ImageU1}}}.gif]] x{{{CompU1Qty}}}
[[{{{CompU1}}}]]
|
|
|
|
|
|
|
|
|
[[Image:{{{ImageV}}}.gif]]
[[{{{ItemV}}}]]
| {{{FeeV}}}g
| [[Image:{{{ImageV1}}}.gif]] x{{{CompV1Qty}}}
[[{{{CompV1}}}]]
|
|
|
|
|
|
|
|
|
[[Image:{{{ImageW}}}.gif]]
[[{{{ItemW}}}]]
| {{{FeeW}}}g
| [[Image:{{{ImageW1}}}.gif]] x{{{CompW1Qty}}}
[[{{{CompW1}}}]]
|
|
|
|
|
|
|
|
|
[[Image:{{{ImageY}}}.gif]]
[[{{{ItemY}}}]]
| {{{FeeY}}}g
| [[Image:{{{ImageY1}}}.gif]] x{{{CompY1Qty}}}
[[{{{CompY1}}}]]
|
|
|
|
|
|
|
|
|
[[Image:{{{ImageZ}}}.gif]]
[[{{{ItemZ}}}]]
| {{{FeeZ}}}g
| [[Image:{{{ImageZ1}}}.gif]] x{{{CompZ1Qty}}}
[[{{{CompZ1}}}]]
|
|
|
|
|
|
|
|
|
Notes: Melon Hat, Melon Stick, and Melon Covered Shield are obtained by open  Melon Gift Box. Strawberry Hat, Strawberry Stick, and Berry Covered Shield are obtained by open Melon Gift Box. Strawberry Hat, Strawberry Stick, and Berry Covered Shield are obtained by open  Strawberry Gift Box. Almond Hat, ChocoAlmond Stick, and ChocoAlmond Shield are obtained by compound Melon with Strawberry Equipments with Compounder Nadia at Megalopolis Square. Strawberry Gift Box. Almond Hat, ChocoAlmond Stick, and ChocoAlmond Shield are obtained by compound Melon with Strawberry Equipments with Compounder Nadia at Megalopolis Square.
|

Melon Gift Box. Strawberry Hat, Strawberry Stick, and Berry Covered Shield are obtained by open
Strawberry Gift Box.


